
این بخش به بررسی جدول ها در بوت استرپ و کلاس های مورد نیاز برای ساخت جدول میپردازد. جدول ها ابزاری هستند برای سازماندهی دادهها به صورت سطر و ستون. با استفاده از جدول، میتوان حجم زیادی از اطلاعات را به شکلی منظم، قابل فهم و مرتب نمایش داد. اگر به دنبال یادگیری کامل و کاربردی هستید، پیشنهاد میکنم دوره تخصصی بوت استرپ را ببینید. این دوره به صورت پروژه محور شما را با تمامی جزئیات طراحی جدول و سایر بخشهای بوت استرپ آشنا میکند.
در ادامه، برخی از عناصر پرکاربرد جدول که در بوت استرپ پشتیبانی میشوند معرفی شدهاند:
| ردیف | تگ و توضیح |
|---|---|
| 1 | <table>پایه و اساس ساخت هر جدول در HTML است؛ همه عناصر جدول مثل سطرها، ستونها و عنوانها باید داخل آن قرار بگیرند. |
| 2 | <thead>برای تعریف بخش بالای جدول استفاده میشود؛ معمولاً سطرهایی که عنوان ستونها را نشان میدهند در این بخش قرار میگیرند. این سطرها باید با <tr> ساخته شوند و سلولهای آنها با <th>. |
| 3 | <tbody>بخش اصلی جدول است که دادهها در آن قرار میگیرند. هر ردیف اطلاعات باید با <tr> ساخته شود و سلولهای هر ردیف با <td>. |
| 4 | <tr>هر ردیف (سطر) از جدول را میسازد؛ داخل این تگ باید از <td> یا <th> برای ساختن سلولهای جدول استفاده کرد. |
| 5 | <td>سلول عادی جدول است که برای نمایش دادههای معمولی در هر ردیف به کار میرود. همیشه باید داخل یک <tr> استفاده شود. |
| 6 | <th>سلول عنوان است و برای نامگذاری ستون یا گاهی ردیفها استفاده میشود. معمولاً در <thead> قرار میگیرد و بهصورت پیشفرض نوشته آن درشت و وسطچین است. |
| 7 | <caption>با این تگ توضیحی کلی درباره محتوای جدول می دهیم. مثلا “لیست کاربران” |
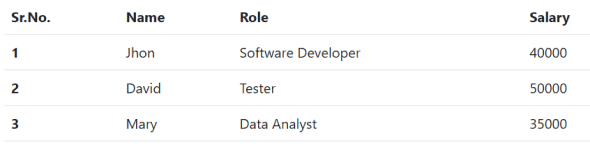
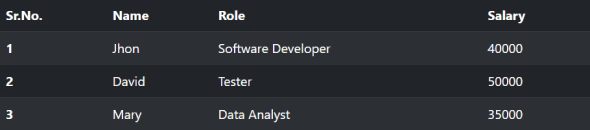
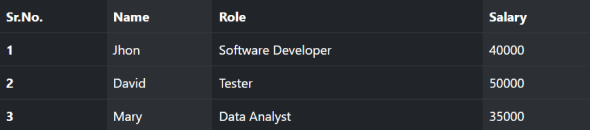
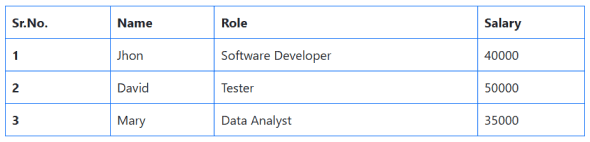
جدول ساده در بوت استرپ
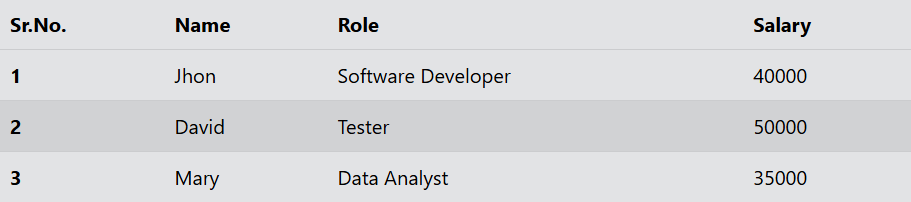
اگر میخواهید یک جدول ساده با حداقل استایل، کمی فضای داخلی (padding) و خطوط افقی داشته باشید، کافی است به عنصر <table> کلاس .table را اضافه کنید. نمونهای از این کار در مثال زیر آمده است.
|
1 2 3 4 5 6 7 8 9 10 11 12 13 14 15 16 17 18 19 20 21 22 23 24 25 26 27 28 29 30 31 32 33 34 35 36 37 38 39 40 41 42 43 |
<DOCTYPE html > <html lang="en"> <head > <meta charset="UTF-8"> <meta http-equiv="X-UA-Compatible" content="IE=edge"> <meta name="viewport" content="width=device-width, initial-scale=1.0"> <link href="https://cdn.jsdelivr.net/npm/bootstrap@5.3.0-alpha3/dist/css/bootstrap.min.css" rel="stylesheet" > <script src="https://cdn.jsdelivr.net/npm/bootstrap@5.3.0-alpha3/dist/js/bootstrap.bundle.min.js" ></script> <title >Bootstrap - Table</title > </head > <body > <table class="table" > <thead > <tr > <th scope="col" >Sr.No.</th > <th scope="col" >Name</th > <th scope="col" >Role</th > <th scope="col" >Salary</th > </tr > </thead > <tbody > <tr > <th scope="row" >1</th > <td >Jhon</td > <td >Software Developer</td > <td >40000</td > </tr > <tr > <th scope="row" >2</th > <td >David</td > <td >Tester</td > <td >50000</td > </tr > <tr > <th scope="row" >3</th > <td >Mary</td > <td >Data Analyst</td > <td >35000</td > </tr > </tbody > </table > </body > </html > |
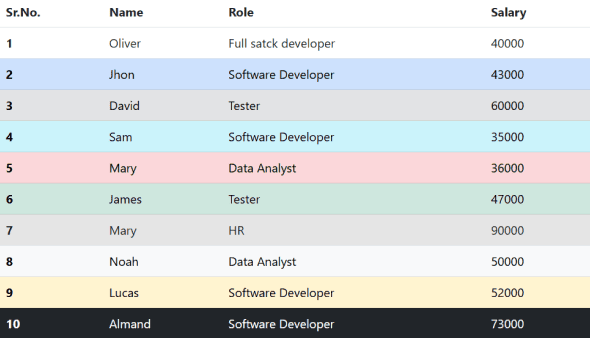
انواع حالت ها (Variants) در جدول بوت استرپ
بوت استرپ این امکان را میدهد که با استفاده از کلاس های زمینه ای (contextual classes) رنگ پسزمینه ردیف ها یا سلول های جدول را تغییر دهید تا بخشهای خاصی از جدول برجستهتر و قابل توجهتر شوند.
برای این کار کافی است به ردیف (<tr>) یا سلول (<td>) مورد نظر یکی از کلاسهای زیر را اضافه کنید:
-
.table-activeبرای نشان دادن حالت فعال یا انتخاب شده -
.table-successبرای نمایش وضعیت موفق یا تأیید شده -
.table-dangerبرای هشدار یا وضعیت خطا -
.table-warningبرای نمایش هشدار یا وضعیت غیرعادی
با افزودن این کلاس ها، ردیف یا سلول مورد نظر با رنگی مناسب وضعیت، برجسته میشود. در مثال زیر میتوان مشاهده کرد که چگونه این کلاسها روی ردیفهای جدول اعمال میشوند.
|
1 2 3 4 5 6 7 8 9 10 11 12 13 14 15 16 17 18 19 20 21 22 23 24 25 26 27 28 29 30 31 32 33 34 35 36 37 38 39 40 41 42 43 44 45 46 47 48 49 50 51 52 53 54 55 56 57 58 59 60 61 62 63 64 65 66 67 68 69 70 71 72 73 74 75 76 77 78 79 80 81 82 83 84 85 |
<!DOCTYPE html> <html lang="en"> <head> <title>Bootstrap - Table</title> <meta charset="UTF-8"> <meta http-equiv="X-UA-Compatible" content="IE=edge"> <meta name="viewport" content="width=device-width, initial-scale=1.0"> <link href="https://cdn.jsdelivr.net/npm/bootstrap@5.3.0-alpha3/dist/css/bootstrap.min.css" rel="stylesheet"> <script src="https://cdn.jsdelivr.net/npm/bootstrap@5.3.0-alpha3/dist/js/bootstrap.bundle.min.js"></script> </head> <body> <table class="table"> <thead> <tr> <th scope="col">Sr.No.</th> <th scope="col">Name</th> <th scope="col">Role</th> <th scope="col">Salary</th> </tr> </thead> <tbody> <tr class="table-default"> <th scope="row">1</th> <td>Oliver</td> <td>Full satck developer</td> <td>40000</td> </tr> <tr class="table-primary"> <th scope="row">2</th> <td>Jhon</td> <td>Software Developer</td> <td>43000</td> </tr> <tr class="table-secondary"> <th scope="row">3</th> <td>David</td> <td>Tester</td> <td>60000</td> </tr> <tr class="table-info"> <th scope="row">4</th> <td>Sam</td> <td>Software Developer</td> <td>35000</td> </tr> <tr class="table-danger"> <th scope="row">5</th> <td>Mary</td> <td>Data Analyst</td> <td>36000</td> </tr> <tr class="table-success"> <th scope="row">6</th> <td>James</td> <td>Tester</td> <td>47000</td> </tr> <tr class="table-active"> <th scope="row">7</th> <td>Mary</td> <td>HR</td> <td>90000</td> </tr> <tr class="table-light"> <th scope="row">8</th> <td>Noah</td> <td>Data Analyst</td> <td>50000</td> </tr> <tr class="table-warning"> <th scope="row">9</th> <td>Lucas</td> <td>Software Developer</td> <td>52000</td> </tr> <tr class="table-dark"> <th scope="row">10</th> <td>Almand</td> <td>Software Developer</td> <td>73000</td> </tr> </tbody> </table> </body> </html> |
با کپی کردن کد بالا در ویرایشگر آنلاین، میتوانید آن را اجرا کنید.
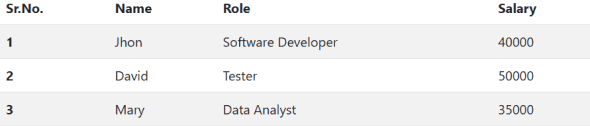
جدول های راه راه (Striped Rows)
برای این که جدول شما ظاهر راه راه یا اصطلاحا “زیبرا” داشته باشد (یعنی رنگ پس زمینه سطرها یکی در میان تغییر کند)، می توانید از کلاس .table-striped استفاده کنید.
کافی است این کلاس را به تگ <table> اضافه کنید تا بوت استرپ به صورت خودکار، سطرهای جدول را به صورت یکی در میان با رنگ متفاوت نمایش دهد. این ویژگی به خوانایی بهتر داده ها کمک می کند، مخصوصا زمانی که جدول شما چندین سطر دارد.
|
1 2 3 4 5 6 7 8 9 10 11 12 13 14 15 16 17 18 19 20 21 22 23 24 25 26 27 28 29 30 31 32 33 34 35 36 37 38 39 40 41 42 43 44 |
<!DOCTYPE html> <html lang="en"> <head> <meta charset="UTF-8"> <meta http-equiv="X-UA-Compatible" content="IE=edge"> <meta name="viewport" content="width=device-width, initial-scale=1.0"> <link href="https://cdn.jsdelivr.net/npm/bootstrap@5.3.0-alpha3/dist/css/bootstrap.min.css" rel="stylesheet" > <script src="https://cdn.jsdelivr.net/npm/bootstrap@5.3.0-alpha3/dist/js/bootstrap.bundle.min.js"></script> <title>Bootstrap - Table</title> </head> <body> <table class="table table-striped"> <thead> <tr> <th scope="col">Sr.No.</th> <th scope="col">Name</th> <th scope="col">Role</th> <th scope="col">Salary</th> </tr> </thead> <tbody> <tr> <th scope="row">1</th> <td>Jhon</td> <td>Software Developer</td> <td>40000</td> </tr> <tr> <th scope="row">2</th> <td>David</td> <td>Tester</td> <td>50000</td> </tr> <tr> <th scope="row">3</th> <td>Mary</td> <td>Data Analyst</td> <td>35000</td> </tr> </tbody> </table> </body> </html> |
با کپی کردن کد بالا در ویرایشگر آنلاین، میتوانید آن را اجرا کنید.
برای این که ستون های جدول به صورت راه راه (یکی در میان با رنگ پس زمینه متفاوت) نمایش داده شوند، می توانید از کلاس .table-striped-columns استفاده کنید. این نوع نمایش، به ویژه زمانی مفید است که جدول شما عرض زیادی دارد و می خواهید خواندن داده های هر ستون ساده تر شود.
|
1 2 3 4 5 6 7 8 9 10 11 12 13 14 15 16 17 18 19 20 21 22 23 24 25 26 27 28 29 30 31 32 33 34 35 36 37 38 39 40 41 42 43 44 |
<!DOCTYPE html> <html> <head> <meta charset="UTF-8"> <meta http-equiv="X-UA-Compatible" content="IE=edge"> <meta name="viewport" content="width=device-width, initial-scale=1.0"> <link href="https://cdn.jsdelivr.net/npm/bootstrap@5.3.0-alpha3/dist/css/bootstrap.min.css" rel="stylesheet"> <script src="https://cdn.jsdelivr.net/npm/bootstrap@5.3.0-alpha3/dist/js/bootstrap.bundle.min.js"></script> <title>Bootstrap - Table</title> </head> <body> <table class="table table-striped-columns"> <thead> <tr> <th scope="col">Sr.No.</th> <th scope="col">Name</th> <th scope="col">Role</th> <th scope="col">Salary</th> </tr> </thead> <tbody> <tr> <th scope="row">1</th> <td>Jhon</td> <td>Software Developer</td> <td>40000</td> </tr> <tr> <th scope="row">2</th> <td>David</td> <td>Tester</td> <td>50000</td> </tr> <tr> <th scope="row">3</th> <td>Mary</td> <td>Data Analyst</td> <td>35000</td> </tr> </tbody> </table> </body> </html> |
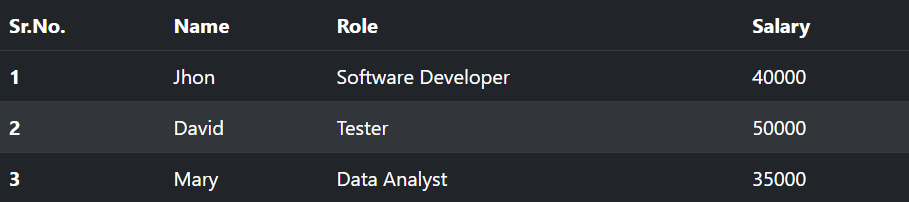
جدول با پس زمینه تیره و خطوط راه راه (Dark Striped Table)
اگر می خواهید جدول شما پس زمینه تیره داشته باشد و همزمان طرح راه راه (زیبرا) روی سطرها اعمال شود، می توانید از ترکیب دو کلاس زیر استفاده کنید:
-
.table-darkبرای ایجاد یک جدول با ظاهر تیره -
.table-stripedبرای اضافه کردن راه راه روی سطرها
با افزودن این دو کلاس به تگ <table>, جدول شما ظاهری حرفه ای، تیره و قابل خواندن خواهد داشت. این نوع طراحی معمولاً در داشبوردها یا تم های تیره کاربرد زیادی دارد.
|
1 2 3 4 5 6 7 8 9 10 11 12 13 14 15 16 17 18 19 20 21 22 23 24 25 26 27 28 29 30 31 32 33 34 35 36 37 38 39 40 41 42 43 |
<!DOCTYPE html> <html> <head> <meta charset="UTF-8"> <meta http-equiv="X-UA-Compatible" content="IE=edge"> <meta name="viewport" content="width=device-width, initial-scale=1.0"> <link href="https://cdn.jsdelivr.net/npm/bootstrap@5.3.0-alpha3/dist/css/bootstrap.min.css" rel="stylesheet"> <script src="https://cdn.jsdelivr.net/npm/bootstrap@5.3.0-alpha3/dist/js/bootstrap.bundle.min.js"></script> <title>Bootstrap - Table</title> </head> <body> <table class="table table-dark table-striped"> <thead> <tr> <th scope="col">Sr.No.</th> <th scope="col">Name</th> <th scope="col">Role</th> <th scope="col">Salary</th> </tr> </thead> <tbody> <tr> <th scope="row">1</th> <td>Jhon</td> <td>Software Developer</td> <td>40000</td> </tr> <tr> <th scope="row">2</th> <td>David</td> <td>Tester</td> <td>50000</td> </tr> <tr> <th scope="row">3</th> <td>Mary</td> <td>Data Analyst</td> <td>35000</td> </tr> </tbody> </table> </body> </html> |
با کپی کردن کد بالا در ویرایشگر آنلاین، میتوانید آن را اجرا کنید.
برای این که ستون های جدول به صورت راه راه و با تم تیره نمایش داده شوند، کافی است دو کلاس زیر را به تگ <table> اضافه کنید:
-
.table-darkبرای اعمال تم تیره به جدول -
.table-striped-columnsبرای ایجاد راه راه در ستون ها
|
1 2 3 4 5 6 7 8 9 10 11 12 13 14 15 16 17 18 19 20 21 22 23 24 25 26 27 28 29 30 31 32 33 34 35 36 37 38 39 40 41 42 43 |
<!DOCTYPE html> <html> <head> <meta charset="UTF-8"> <meta http-equiv="X-UA-Compatible" content="IE=edge"> <meta name="viewport" content="width=device-width, initial-scale=1.0"> <link href="https://cdn.jsdelivr.net/npm/bootstrap@5.3.0-alpha3/dist/css/bootstrap.min.css" rel="stylesheet"> <script src="https://cdn.jsdelivr.net/npm/bootstrap@5.3.0-alpha3/dist/js/bootstrap.bundle.min.js"></script> <title>Bootstrap - Table</title> </head> <body> <table class="table table-dark table-striped-columns"> <thead> <tr> <th scope="col">Sr.No.</th> <th scope="col">Name</th> <th scope="col">Role</th> <th scope="col">Salary</th> </tr> </thead> <tbody> <tr> <th scope="row">1</th> <td>Jhon</td> <td>Software Developer</td> <td>40000</td> </tr> <tr> <th scope="row">2</th> <td>David</td> <td>Tester</td> <td>50000</td> </tr> <tr> <th scope="row">3</th> <td>Mary</td> <td>Data Analyst</td> <td>35000</td> </tr> </tbody> </table> </body> </html> |
با کپی کردن کد بالا در ویرایشگر آنلاین، میتوانید آن را اجرا کنید.
جدول با نوارهای راه راه سبز روشن
برای این که جدول شما ظاهر سبز روشن با ردیف های راه راه داشته باشد، می توانید دو کلاس زیر را به تگ <table> اضافه کنید:
-
.table-successبرای اعمال رنگ پس زمینه سبز روشن -
.table-stripedبرای نمایش سطرها به صورت راه راه (یکی در میان)
|
1 2 3 4 5 6 7 8 9 10 11 12 13 14 15 16 17 18 19 20 21 22 23 24 25 26 27 28 29 30 31 32 33 34 35 36 37 38 39 40 41 42 43 |
<!DOCTYPE html> <html> <head> <meta charset="UTF-8"> <meta http-equiv="X-UA-Compatible" content="IE=edge"> <meta name="viewport" content="width=device-width, initial-scale=1.0"> <link href="https://cdn.jsdelivr.net/npm/bootstrap@5.3.0-alpha3/dist/css/bootstrap.min.css" rel="stylesheet"> <script src="https://cdn.jsdelivr.net/npm/bootstrap@5.3.0-alpha3/dist/js/bootstrap.bundle.min.js"></script> <title>Bootstrap - Table</title> </head> <body> <table class="table table-success table-striped"> <thead> <tr> <th scope="col">Sr.No.</th> <th scope="col">Name</th> <th scope="col">Role</th> <th scope="col">Salary</th> </tr> </thead> <tbody> <tr> <th scope="row">1</th> <td>Jhon</td> <td>Software Developer</td> <td>40000</td> </tr> <tr> <th scope="row">2</th> <td>David</td> <td>Tester</td> <td>50000</td> </tr> <tr> <th scope="row">3</th> <td>Mary</td> <td>Data Analyst</td> <td>35000</td> </tr> </tbody> </table> </body> </html> |
با کپی کردن کد بالا در ویرایشگر آنلاین، میتوانید آن را اجرا کنید.
اگر می خواهید ستون های جدول به صورت یکی در میان و با رنگ سبز روشن نمایش داده شوند، کافی است دو کلاس زیر را به تگ <table> اضافه کنید:
-
.table-successبرای ایجاد پس زمینه سبز روشن -
.table-striped-columnsبرای راه راه شدن ستون ها به صورت یکی در میان
|
1 2 3 4 5 6 7 8 9 10 11 12 13 14 15 16 17 18 19 20 21 22 23 24 25 26 27 28 29 30 31 32 33 34 35 36 37 38 39 40 41 42 43 44 |
<!DOCTYPE html> <html> <head> <meta charset="UTF-8"> <meta http-equiv="X-UA-Compatible" content="IE=edge"> <meta name="viewport" content="width=device-width, initial-scale=1.0"> <link href="https://cdn.jsdelivr.net/npm/bootstrap@5.3.0-alpha3/dist/css/bootstrap.min.css" rel="stylesheet"> <script src="https://cdn.jsdelivr.net/npm/bootstrap@5.3.0-alpha3/dist/js/bootstrap.bundle.min.js"></script> <title>Bootstrap - Table</title> </head> <body> <table class="table table-success table-striped-columns"> <thead> <tr> <th scope="col">Sr.No.</th> <th scope="col">Name</th> <th scope="col">Role</th> <th scope="col">Salary</th> </tr> </thead> <tbody> <tr> <th scope="row">1</th> <td>Jhon</td> <td>Software Developer</td> <td>40000</td> </tr> <tr> <th scope="row">2</th> <td>David</td> <td>Tester</td> <td>50000</td> </tr> <tr> <th scope="row">3</th> <td>Mary</td> <td>Data Analyst</td> <td>35000</td> </tr> </tbody> </table> </body> </html> |
جدول با افکت hover روی سطرها
اگر میخواهید زمانی که نشانگر ماوس روی یک سطر جدول قرار میگیرد، آن سطر تغییر رنگ دهد و برجسته شود، کافی است کلاس .table-hover را به تگ <table> اضافه کنید.
این ویژگی باعث میشود کاربران راحتتر بتوانند سطر مورد نظر خود را هنگام حرکت ماوس شناسایی کنند و برای جدول های تعاملی یا دارای داده های زیاد، تجربه کاربری بهتری فراهم شود.
|
1 2 3 4 5 6 7 8 9 10 11 12 13 14 15 16 17 18 19 20 21 22 23 24 25 26 27 28 29 30 31 32 33 34 35 36 37 38 39 40 41 42 43 |
<!DOCTYPE html> <html lang="en"> <head> <meta charset="UTF-8"> <meta http-equiv="X-UA-Compatible" content="IE=edge"> <meta name="viewport" content="width=device-width, initial-scale=1.0"> <link href="https://cdn.jsdelivr.net/npm/bootstrap@5.3.0-alpha3/dist/css/bootstrap.min.css" rel="stylesheet"> <script src="https://cdn.jsdelivr.net/npm/bootstrap@5.3.0-alpha3/dist/js/bootstrap.bundle.min.js" ></script> <title>Bootstrap - Table</title> </head> <body> <table class="table table-hover table-secondary"> <thead> <tr> <th scope="col">Sr.No.</th> <th scope="col">Name</th> <th scope="col">Role</th> <th scope="col">Salary</th> </tr> </thead> <tbody> <tr> <th scope="row">1</th> <td>Jhon</td> <td>Software Developer</td> <td>40000</td> </tr> <tr> <th scope="row">2</th> <td>David</td> <td>Tester</td> <td>50000</td> </tr> <tr> <th scope="row">3</th> <td>Mary</td> <td>Data Analyst</td> <td>35000</td> </tr> </tbody> </table> </body> </html> |
برای این که جدول شما تم تیره داشته باشد و همچنین هنگام قرار گرفتن ماوس روی هر سطر، آن سطر تغییر رنگ دهد، میتوانید دو کلاس زیر را به تگ <table> اضافه کنید:
-
.table-darkبرای اعمال ظاهر تیره به جدول -
.table-hoverبرای فعال کردن افکت تغییر رنگ هنگام هاور کردن روی سطرها
|
1 2 3 4 5 6 7 8 9 10 11 12 13 14 15 16 17 18 19 20 21 22 23 24 25 26 27 28 29 30 31 32 33 34 35 36 37 38 39 40 41 42 43 44 |
<!DOCTYPE html> <html> <head> <meta charset="UTF-8"> <meta http-equiv="X-UA-Compatible" content="IE=edge"> <meta name="viewport" content="width=device-width, initial-scale=1.0"> <link href="https://cdn.jsdelivr.net/npm/bootstrap@5.3.0-alpha3/dist/css/bootstrap.min.css" rel="stylesheet"> <script src="https://cdn.jsdelivr.net/npm/bootstrap@5.3.0-alpha3/dist/js/bootstrap.bundle.min.js"></script> <title>Bootstrap - Table</title> </head> <body> <table class="table table-dark table-hover"> <thead> <tr> <th scope="col">Sr.No.</th> <th scope="col">Name</th> <th scope="col">Role</th> <th scope="col">Salary</th> </tr> </thead> <tbody> <tr> <th scope="row">1</th> <td>Jhon</td> <td>Software Developer</td> <td>40000</td> </tr> <tr> <th scope="row">2</th> <td>David</td> <td>Tester</td> <td>50000</td> </tr> <tr> <th scope="row">3</th> <td>Mary</td> <td>Data Analyst</td> <td>35000</td> </tr> </tbody> </table> </body> </html> |
برای این که جدول شما همزمان افکت هاور و نمایش راه راه (زیبرا) داشته باشد، کافی است دو کلاس زیر را به تگ <table> اضافه کنید:
-
.table-hoverبرای فعال کردن افکت شناور روی سطرها -
.table-stripedبرای ایجاد سطرهای راه راه به صورت یکی در میان
|
1 2 3 4 5 6 7 8 9 10 11 12 13 14 15 16 17 18 19 20 21 22 23 24 25 26 27 28 29 30 31 32 33 34 35 36 37 38 39 40 41 42 43 |
<!DOCTYPE html> <html> <head> <meta charset="UTF-8"> <meta http-equiv="X-UA-Compatible" content="IE=edge"> <meta name="viewport" content="width=device-width, initial-scale=1.0"> <link href="https://cdn.jsdelivr.net/npm/bootstrap@5.3.0-alpha3/dist/css/bootstrap.min.css" rel="stylesheet"> <script src="https://cdn.jsdelivr.net/npm/bootstrap@5.3.0-alpha3/dist/js/bootstrap.bundle.min.js"></script> <title>Bootstrap - Table</title> </head> <body> <table class="table table-hover table-striped"> <thead> <tr> <th scope="col">Sr.No.</th> <th scope="col">Name</th> <th scope="col">Role</th> <th scope="col">Salary</th> </tr> </thead> <tbody> <tr> <th scope="row">1</th> <td>Jhon</td> <td>Software Developer</td> <td>40000</td> </tr> <tr> <th scope="row">2</th> <td>David</td> <td>Tester</td> <td>50000</td> </tr> <tr> <th scope="row">3</th> <td>Mary</td> <td>Data Analyst</td> <td>35000</td> </tr> </tbody> </table> </body> </html> |
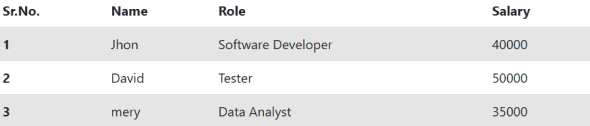
ردیف یا سلول فعال در جدول
برای این که بتوانید یک ردیف یا سلول خاص را در جدول برجسته کنید (مثلاً برای نشان دادن انتخاب یا تمرکز روی آن بخش)، میتوانید از کلاس .table-active استفاده کنید.
|
1 2 3 4 5 6 7 8 9 10 11 12 13 14 15 16 17 18 19 20 21 22 23 24 25 26 27 28 29 30 31 32 33 34 35 36 37 38 39 40 41 42 43 |
<!DOCTYPE html> <html> <head> <meta charset="UTF-8"> <meta http-equiv="X-UA-Compatible" content="IE=edge"> <meta name="viewport" content="width=device-width, initial-scale=1.0"> <link href="https://cdn.jsdelivr.net/npm/bootstrap@5.3.0-alpha3/dist/css/bootstrap.min.css" rel="stylesheet"> <script src="https://cdn.jsdelivr.net/npm/bootstrap@5.3.0-alpha3/dist/js/bootstrap.bundle.min.js"></script> <title>Bootstrap - Table</title> </head> <body> <table class="table"> <thead> <tr> <th scope="col">Sr.No.</th> <th scope="col">Name</th> <th scope="col">Role</th> <th scope="col">Salary</th> </tr> </thead> <tbody> <tr class="table-active"> <th scope="row">1</th> <td>Jhon</td> <td>Software Developer</td> <td>40000</td> </tr> <tr> <th scope="row">2</th> <td>David</td> <td>Tester</td> <td>50000</td> </tr> <tr class="table-active"> <th scope="row">3</th> <td >mery</td> <td>Data Analyst</td> <td>35000</td> </tr> </tbody> </table> </body> </html> |
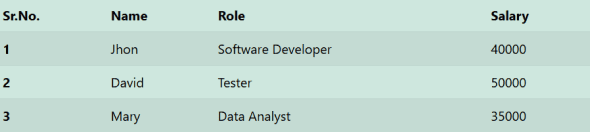
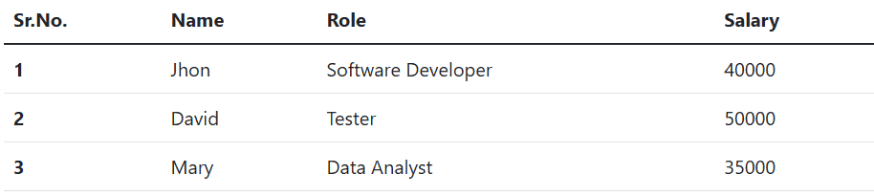
جدول با خطوط مرزی (Bordered Table)
اگر میخواهید دور هر سلول جدول یک خط مرزی مشخص باشد و همچنین جدول بهصورت کلی گوشههای گرد داشته باشد، کافی است کلاس .table-bordered را به تگ <table> اضافه کنید.
|
1 2 3 4 5 6 7 8 9 10 11 12 13 14 15 16 17 18 19 20 21 22 23 24 25 26 27 28 29 30 31 32 33 34 35 36 37 38 39 40 41 42 43 |
<!DOCTYPE html> <html lang="en"> <head> <meta charset="UTF-8"> <meta http-equiv="X-UA-Compatible" content="IE=edge"> <meta name="viewport" content="width=device-width, initial-scale=1.0"> <link href="https://cdn.jsdelivr.net/npm/bootstrap@5.3.0-alpha3/dist/css/bootstrap.min.css" rel="stylesheet" > <script src="https://cdn.jsdelivr.net/npm/bootstrap@5.3.0-alpha3/dist/js/bootstrap.bundle.min.js" ></script> <title>Bootstrap - Table</title> </head> <body> <table class="table table-bordered border-primary"> <thead> <tr> <th scope="col">Sr.No.</th> <th scope="col">Name</th> <th scope="col">Role</th> <th scope="col">Salary</th> </tr> </thead> <tbody> <tr> <th scope="row">1</th> <td>Jhon</td> <td>Software Developer</td> <td>40000</td> </tr> <tr> <th scope="row">2</th> <td>David</td> <td>Tester</td> <td>50000</td> </tr> <tr> <th scope="row">3</th> <td>Mary</td> <td>Data Analyst</td> <td>35000</td> </tr> </tbody> </table> </body> </html> |
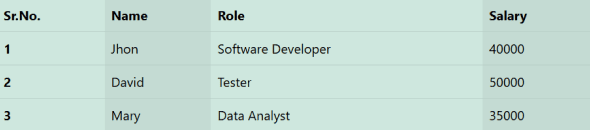
جدول بدون خطوط (Borderless Table)
اگر میخواهید جدولی بدون هیچگونه خطوط مرزی بین سلولها داشته باشید، کافی است کلاس .table-borderless را به تگ <table> اضافه کنید.
|
1 2 3 4 5 6 7 8 9 10 11 12 13 14 15 16 17 18 19 20 21 22 23 24 25 26 27 28 29 30 31 32 33 34 35 36 37 38 39 40 41 42 43 |
<!DOCTYPE html> <html lang="en"> <head> <meta charset="UTF-8"> <meta http-equiv="X-UA-Compatible" content="IE=edge"> <meta name="viewport" content="width=device-width, initial-scale=1.0"> <link href="https://cdn.jsdelivr.net/npm/bootstrap@5.3.0-alpha3/dist/css/bootstrap.min.css" rel="stylesheet" > <script src="https://cdn.jsdelivr.net/npm/bootstrap@5.3.0-alpha3/dist/js/bootstrap.bundle.min.js"></script> <title>Bootstrap - Table</title> </head> <body> <table class="table table-borderless"> <thead> <tr> <th scope="col">Sr.No.</th> <th scope="col">Name</th> <th scope="col">Role</th> <th scope="col">Salary</th> </tr> </thead> <tbody> <tr> <th scope="row">1</th> <td>Jhon</td> <td>Software Developer</td> <td>40000</td> </tr> <tr> <th scope="row">2</th> <td>David</td> <td>Tester</td> <td>50000</td> </tr> <tr> <th scope="row">3</th> <td>Mary</td> <td>Data Analyst</td> <td>35000</td> </tr> </tbody> </table> </body> </html> |
جدول های کوچک در بوت استرپ
اگر میخواهید فضای داخلی سلول ها (padding) را نصف کنید و جدول جمعوجورتر و فشردهتر به نظر برسد، کافی است کلاس .table-sm را به تگ <table> اضافه کنید.

|
1 2 3 4 5 6 7 8 9 10 11 12 13 14 15 16 17 18 19 20 21 22 23 24 25 26 27 28 29 30 31 32 33 34 35 36 37 38 39 40 41 42 43 |
<DOCTYPE html> <html lang="en"> <head> <meta charset="UTF-8"> <meta http-equiv="X-UA-Compatible" content="IE=edge"> <meta name="viewport" content="width=device-width, initial-scale=1.0"> <link href="https://cdn.jsdelivr.net/npm/bootstrap@5.3.0-alpha3/dist/css/bootstrap.min.css" rel="stylesheet"> <script src="https://cdn.jsdelivr.net/npm/bootstrap@5.3.0-alpha3/dist/js/bootstrap.bundle.min.js" ></script> <title>Bootstrap - Table</title> </head> <body> <table class="table table-sm"> <thead> <tr> <th scope="col">Sr.No.</th> <th scope="col">Name</th> <th scope="col">Role</th> <th scope="col">Salary</th> </tr> </thead> <tbody> <tr> <th scope="row">1</th> <td>Jhon</td> <td>Software Developer</td> <td>40000</td> </tr> <tr> <th scope="row">2</th> <td>David</td> <td>Tester</td> <td>50000</td> </tr> <tr> <th scope="row">3</th> <td>Mary</td> <td>Data Analyst</td> <td>35000</td> </tr> </tbody> </table> </body> </html> |
جداکننده های گروه های جدول
اگر میخواهید خطوط مرزی بین بخشهای مختلف جدول مانند <thead>، <tbody> و <tfoot> ضخیمتر و تیرهتر باشند، میتوانید از کلاس .table-sm استفاده کنید.
این کلاس باعث میشود مرزهای جداکننده بین این گروهها برجستهتر شده و جدول ساختارمندتر و خواناتر به نظر برسد.
|
1 2 3 4 5 6 7 8 9 10 11 12 13 14 15 16 17 18 19 20 21 22 23 24 25 26 27 28 29 30 31 32 33 34 35 36 37 38 39 40 41 42 43 |
<DOCTYPE html> <html lang="en"> <head> <meta charset="UTF-8"> <meta http-equiv="X-UA-Compatible" content="IE=edge"> <meta name="viewport" content="width=device-width, initial-scale=1.0"> <link href="https://cdn.jsdelivr.net/npm/bootstrap@5.3.0-alpha3/dist/css/bootstrap.min.css" rel="stylesheet" > <script src="https://cdn.jsdelivr.net/npm/bootstrap@5.3.0-alpha3/dist/js/bootstrap.bundle.min.js" ></script> <title>Bootstrap - Table</title> </head> <body> <table class="table"> <thead> <tr> <th scope="col">Sr.No.</th> <th scope="col">Name</th> <th scope="col">Role</th> <th scope="col">Salary</th> </tr> </thead> <tbody class="table-group-divider"> <tr> <th scope="row">1</th> <td>Jhon</td> <td>Software Developer</td> <td>40000</td> </tr> <tr> <th scope="row">2</th> <td>David</td> <td>Tester</td> <td>50000</td> </tr> <tr> <th scope="row">3</th> <td>Mary</td> <td>Data Analyst</td> <td>35000</td> </tr> </tbody> </table> </body> </html> |
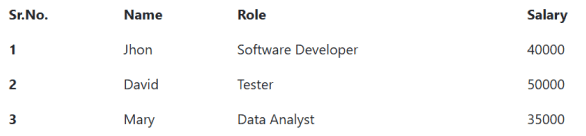
تراز عمودی جدول در بوت استرپ
سلول های جدول در بخش <thead> همیشه از نظر عمودی به سمت پایین تراز می شوند. سلول های موجود در بخش <tbody> تراز خود را از عنصر <table> به ارث می برند و به صورت پیش فرض در بالا تراز می شوند. برای تغییر نحوه تراز بندی، می توانید از کلاس های تراز عمودی استفاده کنید.
|
1 2 3 4 5 6 7 8 9 10 11 12 13 14 15 16 17 18 19 20 21 22 23 24 25 26 27 28 29 30 31 32 33 34 35 36 37 38 39 40 41 42 43 44 45 |
<!DOCTYPE html> <html> <head> <meta charset="UTF-8"> <meta http-equiv="X-UA-Compatible" content="IE=edge"> <meta name="viewport" content="width=device-width, initial-scale=1.0"> <link href="https://cdn.jsdelivr.net/npm/bootstrap@5.3.0-alpha3/dist/css/bootstrap.min.css" rel="stylesheet"> <script src="https://cdn.jsdelivr.net/npm/bootstrap@5.3.0-alpha3/dist/js/bootstrap.bundle.min.js"></script> <title>Bootstrap - Tables</title> </head> <body> <div class="table-responsive"> <table class="table align-middle"> <thead> <tr> <th scope="col">Sr.No.</th> <th scope="col">Name</th> <th scope="col">Role</th> <th scope="col">Salary</th> </tr> </thead> <tbody> <tr> <th scope="row">1</th> <td>Jhon</td> <td>Software Developer</td> <td>40000</td> </tr> <tr class="align-bottom"> <th scope="row">2</th> <td>David</td> <td>Tester</td> <td>50000</td> </tr> <tr> <th scope="row">3</th> <td>Mery</td> <td class="align-top">Data Analyst</td> <td>35000</td> </tr> </tbody> </table> </div> </body> </html> |
جدول واکنش گرا در بوت استرپ
جدول های واکنش گرا امکان پیمایش افقی جدول را فراهم می کنند. با قرار دادن کلاس .table در داخل کلاس .table-responsive، می توانید جدولی ایجاد کنید که در نماهای مختلف صفحه نمایش، واکنش گرا باشد. برای تعیین حداکثر نقطه شکست در یک جدول واکنش گرا، می توانید از کلاس های .table-responsive{-sm|-md|-lg|-xl|-xxl} استفاده کنید. جدول زیر اندازه صفحه نمایش و کلاس متناظر جدول بوت استرپ را نشان می دهد:
| کلاس | عرض صفحه نمایش |
|---|---|
| .table-responsive-sm | کمتر از 576 پیکسل |
| .table-responsive-md | کمتر از 768 پیکسل |
| .table-responsive-lg | کمتر از 992 پیکسل |
| .table-responsive-xl | کمتر از 1200 پیکسل |
| .table-responsive-xxl | کمتر از 1400 پیکسل |

|
1 2 3 4 5 6 7 8 9 10 11 12 13 14 15 16 17 18 19 20 21 22 23 24 25 26 27 28 29 30 31 32 33 34 35 36 37 38 39 40 41 42 43 44 45 46 47 48 49 50 51 52 53 54 55 56 57 58 59 60 61 |
<!DOCTYPE html> <html lang="en"> <head> <meta charset="UTF-8"> <meta http-equiv="X-UA-Compatible" content="IE=edge"> <meta name="viewport" content="width=device-width, initial-scale=1.0"> <link href="https://cdn.jsdelivr.net/npm/bootstrap@5.3.0-alpha3/dist/css/bootstrap.min.css" rel="stylesheet" > <script src="https://cdn.jsdelivr.net/npm/bootstrap@5.3.0-alpha3/dist/js/bootstrap.bundle.min.js"></script> <title>Bootstrap - Table</title> </head> <body> <div class="table-responsive"> <table class="table table-bordered"> <thead> <tr> <th scope="col">Sr.No.</th> <th scope="col">Name</th> <th scope="col">Role</th> <th scope="col">Age</th> <th scope="col">Blood Group</th> <th scope="col">gender</th> <th scope="col">Address</th> <th scope="col">Married</th> <th scope="col">Education</th> <th scope="col">AdharCard Number</th> <th scope="col">Pan Number</th> <th scope="col">City</th> <th scope="col">Country</th> <th scope="col">Salary</th> <th scope="col">status</th> <th scope="col">status</th> <th scope="col">status</th> <th scope="col">status</th> </tr> </thead> <tbody> <tr> <td></td> <td>Jhon</td> <td>Software Developer</td> <td>32</td> <td>A+</td> <td>Male</td> <td>Pune,Maharashtra.</td> <td>Yes</td> <td>B.E(Computer Science)</td> <td>0101010101010101</td> <td>2020200202020202</td> <td>Pune</td> <td>India</td> <td>40000</td> <td>yes</td> <td>yes</td> <td>yes</td> <td>yes</td> </tr> </tbody> </table> </div> </body> </html> |
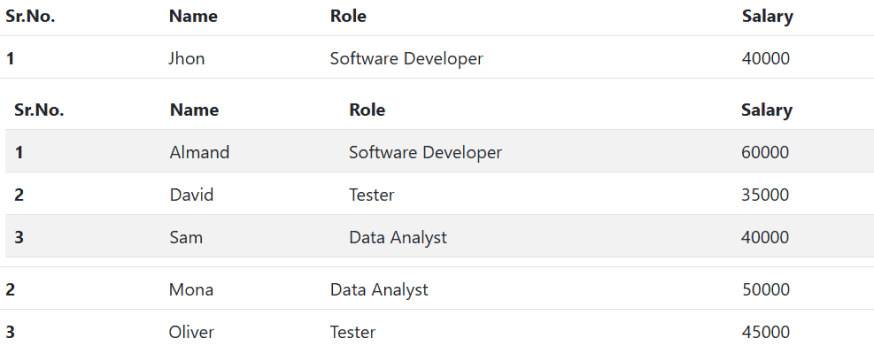
جدول تو در تو در بوت استرپ
از قابلیت تو در تو (Nesting) برای ایجاد یک جدول داخل جدول دیگر استفاده می شود، همانطور که در مثال زیر مشاهده می کنید.
|
1 2 3 4 5 6 7 8 9 10 11 12 13 14 15 16 17 18 19 20 21 22 23 24 25 26 27 28 29 30 31 32 33 34 35 36 37 38 39 40 41 42 43 44 45 46 47 48 49 50 51 52 53 54 55 56 57 58 59 60 61 62 63 64 65 66 67 68 69 70 71 72 73 74 75 76 77 |
<DOCTYPE html> <html lang="en"> <head> <meta charset="UTF-8"> <meta http-equiv="X-UA-Compatible" content="IE=edge"> <meta name="viewport" content="width=device-width, initial-scale=1.0"> <link href="https://cdn.jsdelivr.net/npm/bootstrap@5.3.0-alpha3/dist/css/bootstrap.min.css" rel="stylesheet" > <script src="https://cdn.jsdelivr.net/npm/bootstrap@5.3.0-alpha3/dist/js/bootstrap.bundle.min.js"></script> <title>Bootstrap - Table</title> </head> <body> <table class="table"> <thead class="table"> <tr> <th scope="col">Sr.No.</th> <th scope="col">Name</th> <th scope="col">Role</th> <th scope="col">Salary</th> </tr> </thead> <tbody> <tr> <th scope="row">1</th> <td>Jhon</td> <td>Software Developer</td> <td>40000</td> </tr> <tr> <td colspan="4"> <table class="table mb-0 table-striped"> <thead> <tr> <th scope="col">Sr.No.</th> <th scope="col">Name</th> <th scope="col">Role</th> <th scope="col">Salary</th> </tr> </thead> <tbody> <tr> <th scope="row">1</th> <td>Almand</td> <td>Software Developer</td> <td>60000</td> </tr> <tr> <th scope="row">2</th> <td>David</td> <td>Tester</td> <td>35000</td> </tr> <tr> <th scope="row">3</th> <td>Sam</td> <td>Data Analyst</td> <td>40000</td> </tr> </tbody> </table> </td> </tr> <tr> <th scope="row">2</th> <td>Mona</td> <td>Data Analyst</td> <td>50000</td> </tr> <tr> <th scope="row">3</th> <td>Oliver</td> <td>Tester</td> <td>45000</td> </tr> </tbody> </table> </body> </html> |
ساختار جدول (Anatomy)
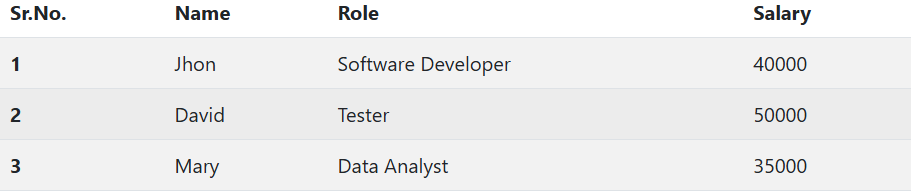
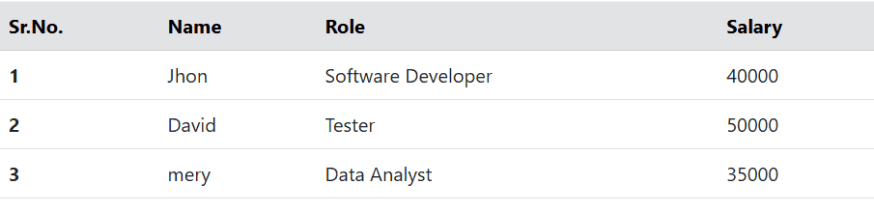
سربرگ جدول (Table Head)
برای این که سربرگ جدول به رنگ خاکستری نمایش داده شود، کافی است کلاس .table-secondary را به بخش <thead> یا به تگ <tr> داخل آن اضافه کنید.
|
1 2 3 4 5 6 7 8 9 10 11 12 13 14 15 16 17 18 19 20 21 22 23 24 25 26 27 28 29 30 31 32 33 34 35 36 37 38 39 40 41 42 43 |
<!DOCTYPE html> <html> <head> <meta charset="UTF-8"> <meta http-equiv="X-UA-Compatible" content="IE=edge"> <meta name="viewport" content="width=device-width, initial-scale=1.0"> <link href="https://cdn.jsdelivr.net/npm/bootstrap@5.3.0-alpha3/dist/css/bootstrap.min.css" rel="stylesheet"> <script src="https://cdn.jsdelivr.net/npm/bootstrap@5.3.0-alpha3/dist/js/bootstrap.bundle.min.js"></script> <title>Bootstrap - Table</title> </head> <body> <table class="table"> <thead class="table-secondary"> <tr> <th scope="col">Sr.No.</th> <th scope="col">Name</th> <th scope="col">Role</th> <th scope="col">Salary</th> </tr> </thead> <tbody> <tr> <th scope="row">1</th> <td>Jhon</td> <td>Software Developer</td> <td>40000</td> </tr> <tr> <th scope="row">2</th> <td>David</td> <td>Tester</td> <td>50000</td> </tr> <tr> <th scope="row">3</th> <td >mery</td> <td>Data Analyst</td> <td>35000</td> </tr> </tbody> </table> </body> </html> |
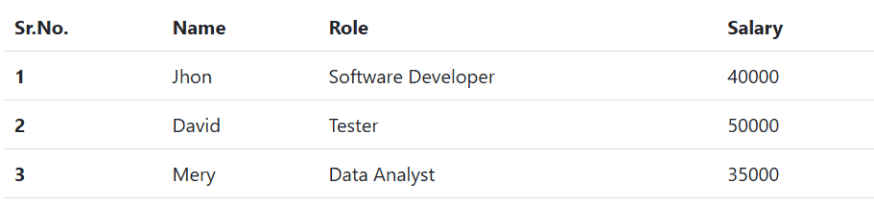
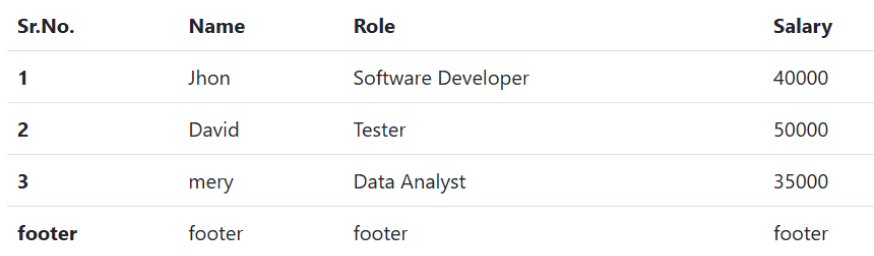
پاورقی جدول (Table Foot)
برای اضافه کردن پاورقی یا بخش انتهایی به جدول، میتوانید از تگ <tfoot> استفاده کنید. این بخش معمولاً شامل اطلاعات جمعبندی، خلاصه یا توضیحات پایانی جدول است.
|
1 2 3 4 5 6 7 8 9 10 11 12 13 14 15 16 17 18 19 20 21 22 23 24 25 26 27 28 29 30 31 32 33 34 35 36 37 38 39 40 41 42 43 44 45 46 47 48 49 50 51 |
<!DOCTYPE html> <html> <head> <meta charset="UTF-8"> <meta http-equiv="X-UA-Compatible" content="IE=edge"> <meta name="viewport" content="width=device-width, initial-scale=1.0"> <link href="https://cdn.jsdelivr.net/npm/bootstrap@5.3.0-alpha3/dist/css/bootstrap.min.css" rel="stylesheet"> <script src="https://cdn.jsdelivr.net/npm/bootstrap@5.3.0-alpha3/dist/js/bootstrap.bundle.min.js"></script> <title>Bootstrap - Table</title> </head> <body> <table class="table"> <thead> <tr> <th scope="col">Sr.No.</th> <th scope="col">Name</th> <th scope="col">Role</th> <th scope="col">Salary</th> </tr> </thead> <tbody> <tr> <th scope="row">1</th> <td>Jhon</td> <td>Software Developer</td> <td>40000</td> </tr> <tr> <th scope="row">2</th> <td>David</td> <td>Tester</td> <td>50000</td> </tr> <tr> <th scope="row">3</th> <td >mery</td> <td>Data Analyst</td> <td>35000</td> </tr> </tbody> <tfoot> <tr> <th scope="row">footer</th> <td >footer</td> <td>footer</td> <td>footer</td> </tr> </tfoot> </table> </body> </html> |
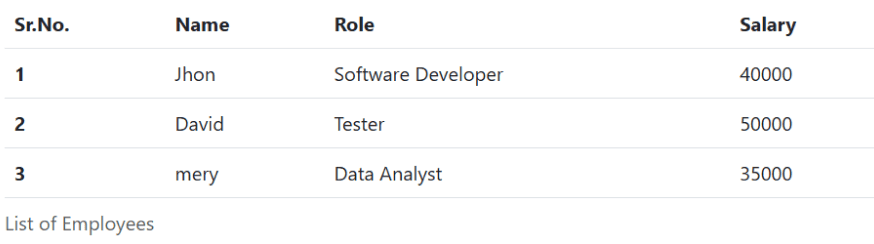
عنوان جدول (Caption)
تگ <caption> برای اضافه کردن یک عنوان به جدول استفاده میشود. همانطور که در مثال زیر مشاهده می کنید و هدف آن توضیح یا معرفی محتوای جدول است.
|
1 2 3 4 5 6 7 8 9 10 11 12 13 14 15 16 17 18 19 20 21 22 23 24 25 26 27 28 29 30 31 32 33 34 35 36 37 38 39 40 41 42 43 44 |
<!DOCTYPE html> <html> <head> <meta charset="UTF-8"> <meta http-equiv="X-UA-Compatible" content="IE=edge"> <meta name="viewport" content="width=device-width, initial-scale=1.0"> <link href="https://cdn.jsdelivr.net/npm/bootstrap@5.3.0-alpha3/dist/css/bootstrap.min.css" rel="stylesheet"> <script src="https://cdn.jsdelivr.net/npm/bootstrap@5.3.0-alpha3/dist/js/bootstrap.bundle.min.js"></script> <title>Bootstrap - Table</title> </head> <body> <table class="table"> <caption>List of Employees</caption> <thead> <tr> <th scope="col">Sr.No.</th> <th scope="col">Name</th> <th scope="col">Role</th> <th scope="col">Salary</th> </tr> </thead> <tbody> <tr> <th scope="row">1</th> <td>Jhon</td> <td>Software Developer</td> <td>40000</td> </tr> <tr> <th scope="row">2</th> <td>David</td> <td>Tester</td> <td>50000</td> </tr> <tr> <th scope="row">3</th> <td >mery</td> <td>Data Analyst</td> <td>35000</td> </tr> </tbody> </table> </body> </html> |
راستی! برای دریافت مطالب جدید در کانال تلگرام یا پیج اینستاگرام سورس باران عضو شوید.
- انتشار: ۳۱ اردیبهشت ۱۴۰۴
دسته بندی موضوعات
- آموزش ارز دیجیتال
- آموزش برنامه نویسی
- آموزش متنی برنامه نویسی
- اطلاعیه و سایر مطالب
- پروژه برنامه نویسی
- دوره های تخصصی برنامه نویسی
- رپورتاژ
- فیلم های آموزشی
- ++C
- ADO.NET
- Adobe Flash
- Ajax
- AngularJS
- apache
- ARM
- Asp.Net
- ASP.NET MVC
- AVR
- Bootstrap
- CCNA
- CCNP
- CMD
- CSS
- Dreameaver
- EntityFramework
- HTML
- IOS
- jquery
- Linq
- Mysql
- Oracle
- PHP
- PHPMyAdmin
- Rational Rose
- silver light
- SQL Server
- Stimulsoft Reports
- Telerik
- UML
- VB.NET&VB6
- WPF
- Xml
- آموزش های پروژه محور
- اتوکد
- الگوریتم تقریبی
- امنیت
- اندروید
- اندروید استودیو
- بک ترک
- بیسیک فور اندروید
- پایتون
- جاوا
- جاوا اسکریپت
- جوملا
- دلفی
- دوره آموزش Go
- دوره های رایگان پیشنهادی
- زامارین
- سئو
- ساخت CMS
- سی شارپ
- شبکه و مجازی سازی
- طراحی الگوریتم
- طراحی بازی
- طراحی وب
- فتوشاپ
- فریم ورک codeigniter
- فلاتر
- کانستراکت
- کریستال ریپورت
- لاراول
- معماری کامپیوتر
- مهندسی اینترنت
- هوش مصنوعی
- یونیتی
- کتاب های آموزشی
- Android
- ASP.NET
- AVR
- LINQ
- php
- Workflow
- اچ تی ام ال
- بانک اطلاعاتی
- برنامه نویسی سوکت
- برنامه نویسی موبایل
- پاسکال
- پایان نامه
- پایتون
- جاوا
- جاوا اسکریپت
- جی کوئری
- داده کاوی
- دلفی
- رباتیک
- سئو
- سایر کتاب ها
- سخت افزار
- سی اس اس
- سی پلاس پلاس
- سی شارپ
- طراحی الگوریتم
- فتوشاپ
- مقاله
- مهندسی نرم افزار
- هک و امنیت
- هوش مصنوعی
- ویژوال بیسیک
- نرم افزار و ابزار برنامه نویسی
- وردپرس