
انیمیشن در برنامه نویسی اندروید

انیمیشن در برنامه نویسی اندروید
در این درس از مجموعه آموزش برنامه نویسی سایت سورس باران، در مورد انیمیشن در برنامه نویسی اندروید صحبت خواهیم کرد.
انیمیشن فرآیند ایجاد حرکت و تغییر شکل است. انیمیشن در برنامه نویسی اندروید از بسیاری جهات امکان پذیر است. در این درس ما به یکی از روشهای آسان و پرکاربرد ساخت انیمیشن به نام انیمیشن tweened خواهیم پرداخت.
Tween Animation
Tween Animation از برخی پارامترها مانند مقدار شروع، مقدار پایان، اندازه، مدت زمان، زاویه چرخش e.t.c استفاده می کند و انیمیشن مورد نیاز را بر روی آن شی انجام می دهد. و می تواند برای هر نوع جسمی اعمال شود. بنابراین برای استفاده از انیمیشن، اندروید برای ما یک کلاس به نام Animation فراهم کرده است.
برای انجام انیمیشن در اندروید، ما می خواهیم یک تابع استاتیک () loadAnimation از کلاس AnimationUtils را فراخوانی کنیم. ما می خواهیم نتیجه را در نمونه ای از Animation Object دریافت کنیم. نحو آن به شرح زیر است –
|
1 2 |
Animation animation = AnimationUtils.loadAnimation(getApplicationContext(), R.anim.myanimation); |
به پارامتر دوم توجه کنید. این نام فایل انیمیشن ما xml است. شما باید یک پوشه جدید به نام anim تحت پوشه res ایجاد کنید و یک فایل xml را در پوشه anim ایجاد کنید.
این کلاس انیمیشن توابع مفیدی دارد که در زیر لیست شده است –
()start
با این متد انیمیشن شروع می شود.
(setDuration(long duration
این متد مدت زمان انیمیشن را تعیین می کند.
()getDuration
این متد مدت زمانی را می یابد که با روش فوق تعیین می شود را دریافت می کند
()end
با این متد انیمیشن پایان می یابد.
()cancel
این متد انیمیشن را لغو می کند.
به منظور استفاده از این انیمیشن روی یک شی، ما فقط نتد () startAnimation را فراخوانی می کنیم. نحو آن است –
|
1 2 |
ImageView image1 = (ImageView)findViewById(R.id.imageView1); image.startAnimation(animation); |
مثال
مثال زیر استفاده از انمیشن در اندروید را نشان می دهد. شما می توانید نوع مختلفی از انیمیشن را از منو انتخاب کنید و انیمیشن انتخاب شده روی یک imageView روی صفحه اعمال می شود.
برای آزمایش این مثال، باید این مورد را روی شبیه ساز یا دستگاه واقعی اجرا کنید.
شرح مراحل
1 شما برای ایجاد یک برنامه Android از Android studio IDE استفاده خواهید کرد و نام آن را به عنوان My Application در یک بسته com.example.sairamkrishna.myapplication قرار دهید.
2 برای افزودن کد انیمیشن ، فایل src / MainActivity.java را تغییر دهید
3 طرح XML را تغییر دهید فایل res / layout / activity_main.xml در صورت لزوم، هر جز GUI اضافه کنید.
4 یک پوشه جدید در پوشه res ایجاد کنید و آن را anim بنامید. با مراجعه به res / anim آن را تایید کنید
5 بر روی anim راست کلیک کرده و بر روی new کلیک کرده و پرونده Android XML را انتخاب کنید باید پرونده های مختلفی که در زیر لیست شده اند ایجاد کنید.
6 پرونده ها را ایجاد کنید myanimation.xml، clockwise.xml، fade.xml، move.xml، blink.xml، slide.xml و کد XML را اضافه کنید.
7 نیازی به تغییر ثابتهای رشته پیش فرض نیست. Android studio از ثابتهای پیش فرض در values / string.xml محافظت می کند.
8 برنامه را اجرا کنید و دستگاه اندرویدی در حال اجرا را انتخاب کنید و برنامه را روی آن نصب کنید و نتایج را تأیید کنید.
در اینجا کد اصلاح شده MainActivity.java وجود دارد.
|
1 2 3 4 5 6 7 8 9 10 11 12 13 14 15 16 17 18 19 20 21 22 23 24 25 26 27 28 29 30 31 32 33 34 35 36 37 38 39 40 41 42 43 44 45 46 47 48 49 50 51 52 53 54 55 56 57 58 59 60 61 |
package com.example.sairamkrishna.myapplication; import android.app.Activity; import android.os.Bundle; import android.view.View; import android.view.animation.Animation; import android.view.animation.AnimationUtils; import android.widget.ImageView; import android.widget.Toast; public class MainActivity extends Activity { @Override protected void onCreate(Bundle savedInstanceState) { super.onCreate(savedInstanceState); setContentView(R.layout.activity_main); } public void clockwise(View view){ ImageView image = (ImageView)findViewById(R.id.imageView); Animation animation = AnimationUtils.loadAnimation(getApplicationContext(), R.anim.myanimation); image.startAnimation(animation); } public void zoom(View view){ ImageView image = (ImageView)findViewById(R.id.imageView); Animation animation1 = AnimationUtils.loadAnimation(getApplicationContext(), R.anim.clockwise); image.startAnimation(animation1); } public void fade(View view){ ImageView image = (ImageView)findViewById(R.id.imageView); Animation animation1 = AnimationUtils.loadAnimation(getApplicationContext(), R.anim.fade); image.startAnimation(animation1); } public void blink(View view){ ImageView image = (ImageView)findViewById(R.id.imageView); Animation animation1 = AnimationUtils.loadAnimation(getApplicationContext(), R.anim.blink); image.startAnimation(animation1); } public void move(View view){ ImageView image = (ImageView)findViewById(R.id.imageView); Animation animation1 = AnimationUtils.loadAnimation(getApplicationContext(), R.anim.move); image.startAnimation(animation1); } public void slide(View view){ ImageView image = (ImageView)findViewById(R.id.imageView); Animation animation1 = AnimationUtils.loadAnimation(getApplicationContext(), R.anim.slide); image.startAnimation(animation1); } } |
در اینجا کد اصلاح شده res / layout / activity_main.xml وجود دارد.
|
1 2 3 4 5 6 7 8 9 10 11 12 13 14 15 16 17 18 19 20 21 22 23 24 25 26 27 28 29 30 31 32 33 34 35 36 37 38 39 40 41 42 43 44 45 46 47 48 49 50 51 52 53 54 55 56 57 58 59 60 61 62 63 64 65 66 67 68 69 70 71 72 73 74 75 76 77 78 79 80 81 82 83 84 85 86 87 88 89 90 91 92 93 94 95 96 97 98 99 100 101 102 103 |
<RelativeLayout xmlns:android="http://schemas.android.com/apk/res/android" xmlns:tools="http://schemas.android.com/tools" android:layout_width="match_parent" android:layout_height="match_parent" android:paddingLeft="@dimen/activity_horizontal_margin" android:paddingRight="@dimen/activity_horizontal_margin" android:paddingTop="@dimen/activity_vertical_margin" android:paddingBottom="@dimen/activity_vertical_margin" tools:context=".MainActivity"> <TextView android:layout_width="wrap_content" android:layout_height="wrap_content" android:text="Alert Dialog" android:id="@+id/textView" android:textSize="35dp" android:layout_alignParentTop="true" android:layout_centerHorizontal="true" /> <TextView android:layout_width="wrap_content" android:layout_height="wrap_content" android:text="Tutorialspoint" android:id="@+id/textView2" android:textColor="#ff3eff0f" android:textSize="35dp" android:layout_below="@+id/textView" android:layout_centerHorizontal="true" /> <ImageView android:layout_width="wrap_content" android:layout_height="wrap_content" android:id="@+id/imageView" android:src="@drawable/abc" android:layout_below="@+id/textView2" android:layout_alignRight="@+id/textView2" android:layout_alignEnd="@+id/textView2" android:layout_alignLeft="@+id/textView" android:layout_alignStart="@+id/textView"/> <Button android:layout_width="wrap_content" android:layout_height="wrap_content" android:text="zoom" android:id="@+id/button" android:layout_below="@+id/imageView" android:layout_alignParentLeft="true" android:layout_alignParentStart="true" android:layout_marginTop="40dp" android:onClick="clockwise"/> <Button android:layout_width="wrap_content" android:layout_height="wrap_content" android:text="clockwise" android:id="@+id/button2" android:layout_alignTop="@+id/button" android:layout_centerHorizontal="true" android:onClick="zoom"/> <Button android:layout_width="wrap_content" android:layout_height="wrap_content" android:text="fade" android:id="@+id/button3" android:layout_alignTop="@+id/button2" android:layout_alignParentRight="true" android:layout_alignParentEnd="true" android:onClick="fade"/> <Button android:layout_width="wrap_content" android:layout_height="wrap_content" android:text="blink" android:onClick="blink" android:id="@+id/button4" android:layout_below="@+id/button" android:layout_alignParentLeft="true" android:layout_alignParentStart="true" /> <Button android:layout_width="wrap_content" android:layout_height="wrap_content" android:text="move" android:onClick="move" android:id="@+id/button5" android:layout_below="@+id/button2" android:layout_alignRight="@+id/button2" android:layout_alignEnd="@+id/button2" android:layout_alignLeft="@+id/button2" android:layout_alignStart="@+id/button2" /> <Button android:layout_width="wrap_content" android:layout_height="wrap_content" android:text="slide" android:onClick="slide" android:id="@+id/button6" android:layout_below="@+id/button3" android:layout_toRightOf="@+id/textView" android:layout_toEndOf="@+id/textView" /> </RelativeLayout> |
در اینجا کد res / anim / myanimation.xml وجود دارد.
|
1 2 3 4 5 6 7 8 9 10 11 12 13 14 15 16 17 18 19 20 21 22 23 24 25 |
<?xml version="1.0" encoding="utf-8"?> <set xmlns:android="http://schemas.android.com/apk/res/android"> <scale xmlns:android="http://schemas.android.com/apk/res/android" android:fromXScale="0.5" android:toXScale="3.0" android:fromYScale="0.5" android:toYScale="3.0" android:duration="5000" android:pivotX="50%" android:pivotY="50%" > </scale> <scale xmlns:android="http://schemas.android.com/apk/res/android" android:startOffset="5000" android:fromXScale="3.0" android:toXScale="0.5" android:fromYScale="3.0" android:toYScale="0.5" android:duration="5000" android:pivotX="50%" android:pivotY="50%" > </scale> </set> |
در اینجا کد res / anim / clockwise.xml وجود دارد.
|
1 2 3 4 5 6 7 8 9 10 11 12 13 14 15 16 17 18 19 20 21 |
<?xml version="1.0" encoding="utf-8"?> <set xmlns:android="http://schemas.android.com/apk/res/android"> <rotate xmlns:android="http://schemas.android.com/apk/res/android" android:fromDegrees="0" android:toDegrees="360" android:pivotX="50%" android:pivotY="50%" android:duration="5000" > </rotate> <rotate xmlns:android="http://schemas.android.com/apk/res/android" android:startOffset="5000" android:fromDegrees="360" android:toDegrees="0" android:pivotX="50%" android:pivotY="50%" android:duration="5000" > </rotate> </set> |
در اینجا کد res / anim / fade.xml وجود دارد
|
1 2 3 4 5 6 7 8 9 10 11 12 13 14 15 16 17 18 |
<?xml version="1.0" encoding="utf-8"?> <set xmlns:android="http://schemas.android.com/apk/res/android" android:interpolator="@android:anim/accelerate_interpolator" > <alpha android:fromAlpha="0" android:toAlpha="1" android:duration="2000" > </alpha> <alpha android:startOffset="2000" android:fromAlpha="1" android:toAlpha="0" android:duration="2000" > </alpha> </set> |
در اینجا کد res / anim / blink.xml وجود دارد.
|
1 2 3 4 5 6 7 8 9 |
<?xml version="1.0" encoding="utf-8"?> <set xmlns:android="http://schemas.android.com/apk/res/android"> <alpha android:fromAlpha="0.0" android:toAlpha="1.0" android:interpolator="@android:anim/accelerate_interpolator" android:duration="600" android:repeatMode="reverse" android:repeatCount="infinite"/> </set> |
در اینجا کد res / anim / move.xml وجود دارد.
|
1 2 3 4 5 6 7 8 9 10 11 |
<?xml version="1.0" encoding="utf-8"?> <set xmlns:android="http://schemas.android.com/apk/res/android" android:interpolator="@android:anim/linear_interpolator" android:fillAfter="true"> <translate android:fromXDelta="0%p" android:toXDelta="75%p" android:duration="800" /> </set> |
در اینجا کد res / anim / slide.xml وجود دارد
|
1 2 3 4 5 6 7 8 9 10 11 12 |
<?xml version="1.0" encoding="utf-8"?> <set xmlns:android="http://schemas.android.com/apk/res/android" android:fillAfter="true" > <scale android:duration="500" android:fromXScale="1.0" android:fromYScale="1.0" android:interpolator="@android:anim/linear_interpolator" android:toXScale="1.0" android:toYScale="0.0" /> </set> |
در اینجا کد اصلاح شده res / values / string.xml وجود دارد.
|
1 2 3 |
<resources> <string name="app_name">My Application</string> </resources> |
در اینجا کد پیش فرض AndroidManifest.xml وجود دارد.
|
1 2 3 4 5 6 7 8 9 10 11 12 13 14 15 16 17 18 19 20 21 22 23 |
<?xml version="1.0" encoding="utf-8"?> <manifest xmlns:android="http://schemas.android.com/apk/res/android" package="com.example.sairamkrishna.myapplication" > <application android:allowBackup="true" android:icon="@drawable/ic_launcher" android:label="@string/app_name" android:theme="@style/AppTheme" > <activity android:name="com.example.animation.MainActivity" android:label="@string/app_name" > <intent-filter> <action android:name="android.intent.action.MAIN" /> <category android:name="android.intent.category.LAUNCHER" /> </intent-filter> </activity> </application> </manifest> |
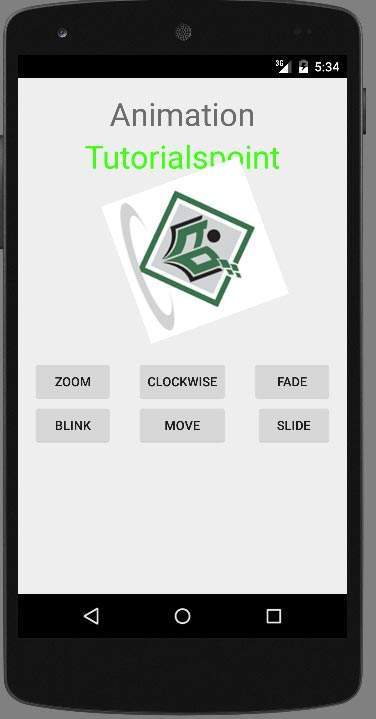
بیایید برنامه را اجرا کنیم. من تصور می کنم شما AVD خود را هنگام راه اندازی محیط ایجاد کرده اید. برای اجرای برنامه از Android studio، یکی از پرونده های فعالیت پروژه خود را باز کنید و از نوار ابزار روی  کلیک کنید. Android Studio برنامه را روی AVD شما نصب کرده و شروع به کار می کند و اگر با تنظیمات و برنامه هایتان همه چیز خوب باشد، زیر پنجره شبیه ساز نمایش داده می شود.
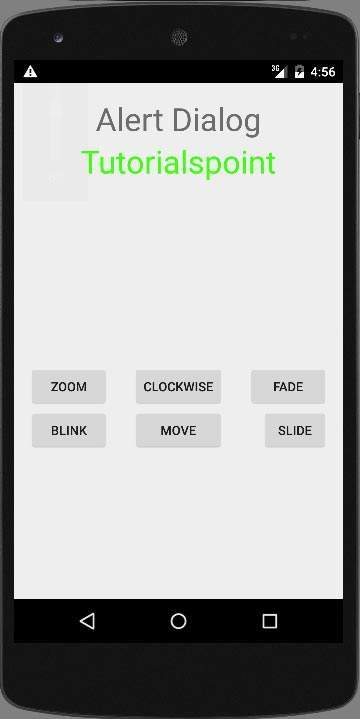
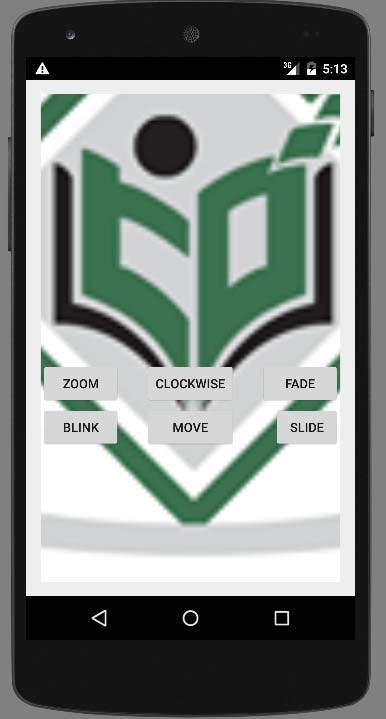
دکمه zoom را انتخاب کنید، صفحه زیر نمایش داده می شود
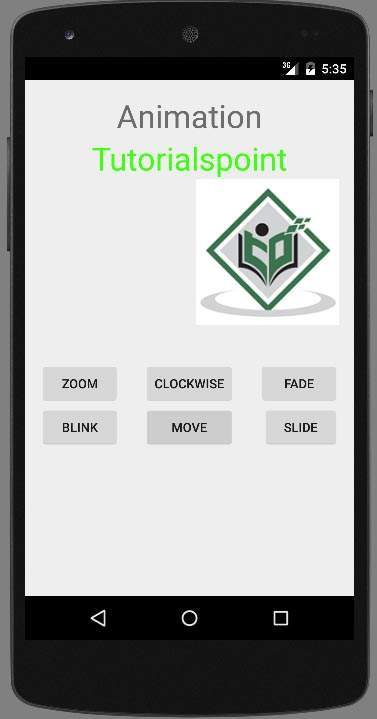
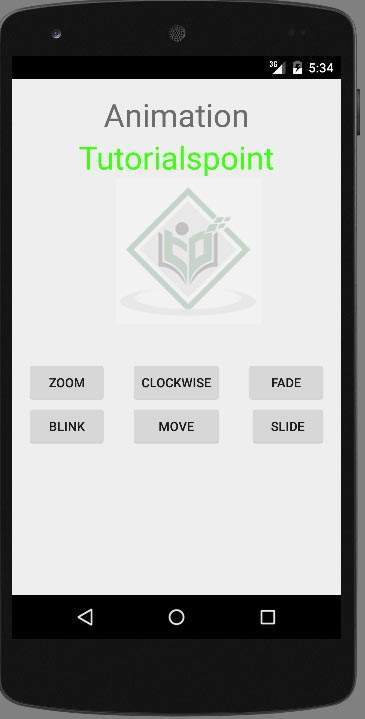
حالا دکمه slide را انتخاب کنید، صفحه زیر نمایش داده می شود.
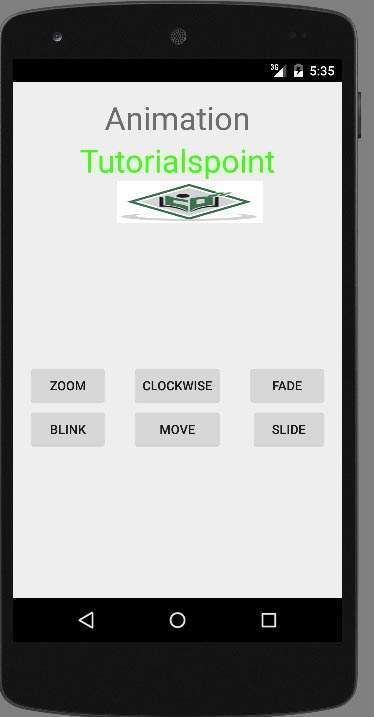
حالا دکمه move را انتخاب کنید، صفحه زیر نمایش داده می شود.
حالا دکمه clockwise را انتخاب کنید، صفحه زیر نمایش داده می شود.
حالا دکمه Fade را انتخاب کنید، صفحه زیر نمایش داده می شود.
توجه – اگر آن را در شبیه ساز اجرا کنید، ممکن است جلوه انیمیشن روان را تجربه نکنید. برای اینکه انیمیشن روان را تجربه کنید، باید آن را در موبایل اندروید خود اجرا کنید.
لیست جلسات قبل آموزش برنامه نویسی اندروید
- نگاهی کلی به برنامه نویسی اندروید
- تنظیمات محیط در برنامه نویسی اندروید
- معماری برنامه نویسی اندروید
- اجزای برنامه در برنامه نویسی اندروید
- Hello World در برنامه نویسی اندروید
- سازماندهی و دسترسی به منابع در برنامه نویسی اندروید
- فعالیت در برنامه نویسی اندروید
- سرویس در برنامه نویسی اندروید
- گیرنده های پخش در برنامه نویسی اندروید
- ارائه دهنده محتوا در برنامه نویسی اندروید
- قطعات در برنامه نویسی اندروید
- Intent و فیلتر در برنامه نویسی اندروید
- طرح بندی رابط کاربری در برنامه نویسی اندروید
- کنترل های رابط کاربری در برنامه نویسی اندروید
- مدیریت رویدادها در برنامه نویسی اندروید
- استایل و تم ها در برنامه نویسی اندروید
- اجزای سفارشی در برنامه نویسی اندروید
- کشیدن و رها کردن در برنامه نویسی اندروید
- نوتیفیکیشن ها در برنامه نویسی اندروید
- سرویس های مبتنی بر مکان در برنامه نویسی اندروید
- ارسال ایمیل در برنامه نویسی اندروید
- ارسال پیامک در برنامه نویسی اندروید
- تماس های تلفنی در برنامه نویسی اندروید
- انتشار برنامه اندروید
- آموزش Alert Dialog در برنامه نویسی اندروید


.svg)
دیدگاه شما