
اجزای سفارشی در برنامه نویسی اندروید

اجزای سفارشی در برنامه نویسی اندروید
در این درس از مجموعه آموزش برنامه نویسی سایت سورس باران، در مورد اجزای سفارشی در برنامه نویسی اندروید صحبت خواهیم کرد.
اندروید یک لیست عالی از ابزارک های (ویجت) از پیش ساخته شده مانند دکمه ، TextView ،EditText ،ListView ،CheckBox ،RadioButton ،Gallery ،Spinner ،AutoCompleteTextView و غیره را ارائه می دهد که می توانید مستقیماً در توسعه برنامه خود از آنها استفاده کنید ، اما ممکن است شرایطی پیش بیاید که با عملکرد و کارایی هیچ یک از ابزارک های موجود راضی نباشید. اندروید به شما امکان ایجاد اجزای سفارشی در اندروید را می دهد که می توانید متناسب با نیازهای خود سفارشی کنید.
اگر فقط لازم است ویجت یا طرح موجود را تنظیمات کوچکی انجام دهید، می توانید ویجت یا طرح را زیر کلاس کنید و روش های آن را کنترل کنید ، این امر به شما امکان کنترل دقیق ظاهر و عملکرد عنصر صفحه را می دهد.
این آموزش نحوه ایجاد نماهای سفارشی و استفاده از آنها را در برنامه خود با استفاده از مراحل ساده توضیح می دهد.
ایجاد یک مولفه سفارشی ساده
- شما برای ایجاد یک برنامه اندروید از Android studio IDE استفاده خواهید کرد و آن را به عنوان myapplication در یک بسته com.example.tutorialspoint7.myapplication نامگذاری می کنید.
- یک فایل XML res / values / attrs.xml ایجاد کنید تا ویژگی های جدید را به همراه نوع داده آنها تعریف کند.
- پرونده src / mainactivity.java ایجاد کرده و کد را برای تعریف مولفه سفارشی خود اضافه کنید
- فایل res / layout / activity_main.xml را تغییر دهید و کد را اضافه کنید تا نمونه Color به همراه چند ویژگی پیش فرض و ویژگی های جدید ایجاد شود.
- برنامه را اجرا کنید تا شبیه ساز اندروید را راه اندازی کرده و نتیجه تغییرات انجام شده در برنامه را تأیید کنید.
فایل ویژگی های زیر را با نام attrs.xml در پوشه res / values خود ایجاد کنید.
|
1 2 3 4 5 6 7 8 9 |
<?xml version="1.0" encoding="utf-8"?> <resources> <declare-styleable name="TimeView"> <declare-styleable name="TimeView"> <attr name="title" format="string" /> <attr name="setColor" format="boolean"/> </declare-styleable> </declare-styleable> </resources> |
فایل طرح بندی مورد استفاده توسط activity را به حالت زیر تغییر دهید.
|
1 2 3 4 5 6 7 8 9 10 11 12 13 14 15 16 17 18 19 20 21 22 23 24 |
<?xml version="1.0" encoding="utf-8"?> <RelativeLayout xmlns:android="http://schemas.android.com/apk/res/android" xmlns:tools="http://schemas.android.com/tools" xmlns:custom="http://schemas.android.com/apk/res-auto" android:layout_width="match_parent" android:layout_height="match_parent" tools:context=".MainActivity" > <com.example.tutorialspoint7.myapplication.TimeView android:id="@+id/timeView" android:layout_width="match_parent" android:layout_height="wrap_content" android:textColor="#fff" android:textSize="40sp" custom:title="my time view" custom:setColor="true" /> <TextView android:layout_width="match_parent" android:layout_height="wrap_content" android:id="@+id/simple" android:layout_below="@id/timeView" android:layout_marginTop="10dp" /> </RelativeLayout> |
فایل java زیر را با نام timeview برای compound view خود ایجاد کنید.
|
1 2 3 4 5 6 7 8 9 10 11 12 13 14 15 16 17 18 19 20 21 22 23 24 25 26 27 28 29 30 31 32 33 34 35 36 37 38 39 40 41 42 43 44 45 46 47 48 49 50 51 52 53 54 55 56 57 58 59 60 61 62 63 64 65 66 67 68 69 70 71 72 73 74 75 76 77 78 79 80 81 82 |
package com.example.tutorialspoint7.myapplication; /** * Created by TutorialsPoint7 on 9/14/2016. */ import java.text.SimpleDateFormat; import java.util.Calendar; import android.content.Context; import android.content.res.TypedArray; import android.graphics.Color; import android.util.AttributeSet; import android.widget.TextView; public class TimeView extends TextView { private String titleText; private boolean color; public TimeView(Context context) { super(context); setTimeView(); } public TimeView(Context context, AttributeSet attrs) { super(context, attrs); // retrieved values correspond to the positions of the attributes TypedArray typedArray = context.obtainStyledAttributes(attrs, R.styleable.TimeView); int count = typedArray.getIndexCount(); try{ for (int i = 0; i < count; ++i) { int attr = typedArray.getIndex(i); // the attr corresponds to the title attribute if(attr == R.styleable.TimeView_title) { // set the text from the layout titleText = typedArray.getString(attr); setTimeView(); } else if(attr == R.styleable.TimeView_setColor) { // set the color of the attr "setColor" color = typedArray.getBoolean(attr, false); decorateText(); } } } // the recycle() will be executed obligatorily finally { // for reuse typedArray.recycle(); } } public TimeView(Context context, AttributeSet attrs, int defStyle) { super(context, attrs, defStyle); setTimeView(); } private void setTimeView() { // has the format hour.minuits am/pm SimpleDateFormat dateFormat = new SimpleDateFormat("hh.mm aa"); String time = dateFormat.format(Calendar.getInstance().getTime()); if(this.titleText != null ) setText(this.titleText+" "+time); else setText(time); } private void decorateText() { // when we set setColor attribute to true in the XML layout if(this.color == true){ // set the characteristics and the color of the shadow setShadowLayer(4, 2, 2, Color.rgb(250, 00, 250)); setBackgroundColor(Color.CYAN); } else { setBackgroundColor(Color.RED); } } } |
فایل Java فعالیت اصلی خود را به کد زیر تغییر دهید و برنامه خود را اجرا کنید.
|
1 2 3 4 5 6 7 8 9 10 11 12 13 14 15 16 17 18 19 20 21 22 23 24 25 26 27 28 29 30 31 32 33 34 35 36 37 38 39 40 41 42 43 44 45 46 47 48 49 50 51 52 53 54 55 56 57 58 59 60 61 62 63 64 65 66 67 68 69 70 71 72 73 74 75 76 77 78 79 80 81 82 |
package com.example.tutorialspoint7.myapplication; /** * Created by TutorialsPoint7 on 9/14/2016. */ import java.text.SimpleDateFormat; import java.util.Calendar; import android.content.Context; import android.content.res.TypedArray; import android.graphics.Color; import android.util.AttributeSet; import android.widget.TextView; public class TimeView extends TextView { private String titleText; private boolean color; public TimeView(Context context) { super(context); setTimeView(); } public TimeView(Context context, AttributeSet attrs) { super(context, attrs); // retrieved values correspond to the positions of the attributes TypedArray typedArray = context.obtainStyledAttributes(attrs, R.styleable.TimeView); int count = typedArray.getIndexCount(); try{ for (int i = 0; i < count; ++i) { int attr = typedArray.getIndex(i); // the attr corresponds to the title attribute if(attr == R.styleable.TimeView_title) { // set the text from the layout titleText = typedArray.getString(attr); setTimeView(); } else if(attr == R.styleable.TimeView_setColor) { // set the color of the attr "setColor" color = typedArray.getBoolean(attr, false); decorateText(); } } } // the recycle() will be executed obligatorily finally { // for reuse typedArray.recycle(); } } public TimeView(Context context, AttributeSet attrs, int defStyle) { super(context, attrs, defStyle); setTimeView(); } private void setTimeView() { // has the format hour.minuits am/pm SimpleDateFormat dateFormat = new SimpleDateFormat("hh.mm aa"); String time = dateFormat.format(Calendar.getInstance().getTime()); if(this.titleText != null ) setText(this.titleText+" "+time); else setText(time); } private void decorateText() { // when we set setColor attribute to true in the XML layout if(this.color == true){ // set the characteristics and the color of the shadow setShadowLayer(4, 2, 2, Color.rgb(250, 00, 250)); setBackgroundColor(Color.CYAN); } else { setBackgroundColor(Color.RED); } } } |
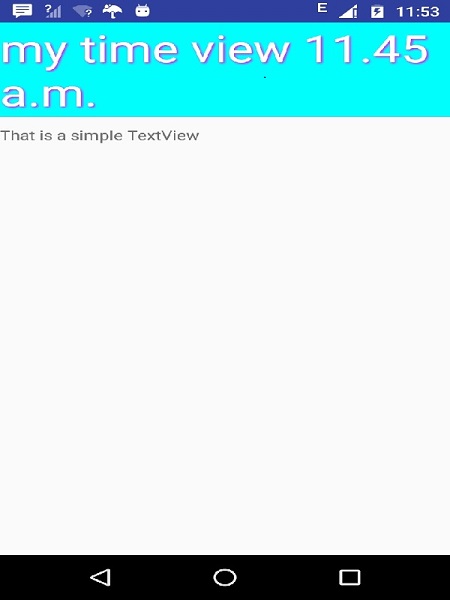
برنامه در حال اجرا باید مانند تصویر زیر باشد.
لیست جلسات قبل آموزش برنامه نویسی اندروید
- نگاهی کلی به برنامه نویسی اندروید
- تنظیمات محیط در برنامه نویسی اندروید
- معماری برنامه نویسی اندروید
- اجزای برنامه در برنامه نویسی اندروید
- Hello World در برنامه نویسی اندروید
- سازماندهی و دسترسی به منابع در برنامه نویسی اندروید
- فعالیت در برنامه نویسی اندروید
- سرویس در برنامه نویسی اندروید
- گیرنده های پخش در برنامه نویسی اندروید
- ارائه دهنده محتوا در برنامه نویسی اندروید
- قطعات در برنامه نویسی اندروید
- Intent و فیلتر در برنامه نویسی اندروید
- طرح بندی رابط کاربری در برنامه نویسی اندروید
- کنترل های رابط کاربری در برنامه نویسی اندروید
- مدیریت رویدادها در برنامه نویسی اندروید
- استایل و تم ها در برنامه نویسی اندروید


.svg)
دیدگاه شما