
نوتیفیکیشن ها در برنامه نویسی اندروید
نوتیفیکیشن ها در برنامه نویسی اندروید
در این درس از مجموعه آموزش برنامه نویسی سایت سورس باران، در مورد نوتیفیکیشن ها در برنامه نویسی اندروید صحبت خواهیم کرد.
نوتیفیکیشن ها در برنامه نویسی اندروید پیامی است که می توانید خارج از رابط کاربری عادی برنامه خود به کاربر نمایش دهید. وقتی به سیستم می گویید یک نوتیفیکیشن یا اعلان صادر کند، ابتدا به عنوان نمادی در قسمت انوتیفیکیشن ها ظاهر می شود. برای دیدن جزئیات اعلان، کاربر کشوی نوتیفیکیشن ها را باز می کند. هر دو قسمت نوتیفیکیشن ها و کشوی نوتیفیکیشن ها مناطقی هستند که توسط سیستم کنترل می شوند و کاربر می تواند در هر زمان آنها را مشاهده کند.
کلاس Android Toast یک روش مفید برای نشان دادن نوتیفیکیشن کاربران فراهم می کند اما مشکل این است که این هشدارها پایدار نیستند، به این معنی که هشدار برای چند ثانیه روی صفحه چشمک می زند و سپس ناپدید می شود..

برای دیدن جزئیات نوتیفیکیشن ها در اندروید، باید آیکونی را انتخاب کنید که کشوی اعلان را با جزئیات نوتیفیکیشن ها نمایش دهد. در حالی که با شبیه ساز با دستگاه مجازی کار می کنید، باید بر روی نوار وضعیت کلیک کرده و بکشید تا آن را گسترش دهید، که جزئیات زیر را به شما ارائه می دهد.
در فرم منبسط شده می توانید یک نمای بزرگ داشته باشید که جزئیات بیشتری در مورد نوتیفیکیشن ها خواهد داشت. می توانید شش خط اضافی را در اعلان اضافه کنید. عکس صفحه زیر چنین اعلانی را نشان می دهد.
ایجاد و ارسال نوتیفیکیشن ها
شما روش ساده ای برای ایجاد یک نوتیفیکیشن دارید. برای ایجاد یک نوتیفیکیشن مراحل زیر را در برنامه خود دنبال کنید –
مرحله 1 – ایجاد سازنده نوتیفیکیشن
به عنوان اولین گام، ایجاد یک سازنده نوتیفیکیشن با استفاده از()NotificationCompat.Builder.build است. برای تنظیم ویژگی های مختلف اعلان مانند کوچک و بزرگ ، از Notification Builder استفاده خواهید کرد
|
1 |
NotificationCompat.Builder mBuilder = new NotificationCompat.Builder(this) |
مرحله 2 – تنظیم ویژگی های نوتیفیکیشن
پس از ساختن شی سازنده نوتیفیکیشن، می توانید ویژگی های نوتیفیکیشن آن را با توجه به نیاز خود با استفاده از شی سازنده تنظیم کنید. اما این موارد زیر الزامی است –
- آیکون کوچک، توسط ()setSmallIcon
- عنوان، توسط ()setContentTitle
- متن جزئیات ، توسط ()setContentText
|
1 2 3 |
mBuilder.setSmallIcon(R.drawable.notification_icon); mBuilder.setContentTitle("Notification Alert, Click Me!"); mBuilder.setContentText("Hi, This is Android Notification Detail!"); |
مرحله 3 -پیوست کردن Action ها
این یک قسمت اختیاری است و اگر بخواهید اکشنی را با نوتیفیکیشن پیوست کنید لازم است. یک اکشن به کاربران امکان می دهد مستقیماً از نوتیفیکیشن به فعالیتی در برنامه شما بروند ، جایی که می توانند یک یا چند رویداد را مشاهده کنند یا کارهای بیشتری انجام دهند.
این اقدام توسط یک PendingIntent حاوی Intent تعریف می شود که فعالیتی را در برنامه شما شروع می کند. برای مرتبط کردن PendingIntent با یک حرکت، با متد NotificationCompat.Builder را فراخوانی کنید. به عنوان مثال ، اگر می خواهید وقتی کاربر بر روی متن اعلان در کشوی اعلان کلیک می کند Activity را شروع کنید ، با فراخوانی setContentIntent () PendingIntent را اضافه می کنید.
یک شی PendingIntent به شما کمک می کند تا اغلب در زمان های بعدی، صرف نظر از این که برنامه شما در حال اجرا باشد یا نه؛ عملی را روی برنامه های خود انجام دهید.
ما از شی سازنده پشته که شامل یک پشته مصنوعی برایActivity آغاز شده است کمک می گیریم. این تضمین می کند که حرکت به عقب از Activity برنامه شما را به صفحه اصلی منتقل می کند.
|
1 2 3 4 5 6 7 8 |
Intent resultIntent = new Intent(this, ResultActivity.class); TaskStackBuilder stackBuilder = TaskStackBuilder.create(this); stackBuilder.addParentStack(ResultActivity.class); // Adds the Intent that starts the Activity to the top of the stack stackBuilder.addNextIntent(resultIntent); PendingIntent resultPendingIntent = stackBuilder.getPendingIntent(0,PendingIntent.FLAG_UPDATE_CURRENT); mBuilder.setContentIntent(resultPendingIntent); |
مرحله 4 -ارسال نوتیفیکیشن
سرانجام ، شما با ارسال () NotificationManager.notify برای ارسال نوتیفیکیشن خود ، شی Notification را به سیستم منتقل می کنید. اطمینان حاصل کنید که قبل از اعلان کردن، با متد()NotificationCompat.Builder.build فراخوانی. این روش همه گزینه هایی را که تنظیم شده است ترکیب می کند و یک شی نوتیفیکیشن جدید را برمی گرداند.
|
1 2 3 4 |
NotificationManager mNotificationManager = (NotificationManager) getSystemService(Context.NOTIFICATION_SERVICE); // notificationID allows you to update the notification later on. mNotificationManager.notify(notificationID, mBuilder.build()); |
کلاس NotificationCompat.Builder
کلاس NotificationCompat.Builder امکان کنترل آسانتر همه فلگ (پرچم) ها و همچنین کمک به ساخت طرح های نوتیفیکیشن معمولی را دارد. در زیر چند روش مهم و متداول استفاده شده به عنوان بخشی از کلاس NotificationCompat.Builder موجود است.
()Notification build
همه گزینه های تنظیم شده را با هم ترکیب کنید و یک شی Notification جدید را برگردانید.
(NotificationCompat.Builder setAutoCancel (boolean autoCancel
تنظیم این پرچم باعث می شود تا با کلیک کاربر بر روی صفحه، نوتیفیکیشن به طور خودکار لغو شود.
(NotificationCompat.Builder setContent (RemoteViews views
RemoteViews سفارشی را تهیه کنید تا به جای نمونه استاندارد از آن استفاده کنید.
(NotificationCompat.Builder setContentInfo (CharSequence info
تنظیم متن بزرگ را در سمت راست نوتیفیکیشن
(NotificationCompat.Builder setContentIntent (PendingIntent intent
با کلیک بر روی نوتیفیکیشن، یک PendingIntent را ارسال کنید.
(NotificationCompat.Builder setContentText (CharSequence text
تنظیم متن (ردیف دوم) نوتیفیکیشن را در یک نوتیفیکیشن استاندارد.
(NotificationCompat.Builder setContentTitle (CharSequence title
تنظیم متن (ردیف اول) نوتیفیکیشن را در یک نوتیفیکیشن استاندارد.
(NotificationCompat.Builder setDefaults (int defaults
تنظیم گزینه های پیش فرض نوتیفیکیشن که استفاده می شود
(NotificationCompat.Builder setLargeIcon (Bitmap icon
تنظیم آیکون بزرگی که در نوتیفیکیشن نشان داده می شود.
(NotificationCompat.Builder setNumber (int number
تنظیم عدد بزرگ در سمت راست نوتیفیکیشن
(NotificationCompat.Builder setOngoing (boolean ongoing
تنظیم می نمایید که آیا این نوتیفیکشن مداوم باشد.
(NotificationCompat.Builder setSmallIcon (int icon
تنظیم آیکون کوچک را برای استفاده در طرح بندی های نوتیفیکشن
(NotificationCompat.Builder setStyle (NotificationCompat.Style style
افزودن یک استایل قدرتمند نوتیفیکیشن تا در زمان ایجاد اعمال شود.
(NotificationCompat.Builder setTicker (CharSequence tickerText)
تنظیم متنی که در نوار وضعیت؛ هنگامی نمایش می یابد که برای اولین نوتیفیکیشن به کاربر می رسد.
(NotificationCompat.Builder setVibrate (long[] pattern
تنظیم الگوی لرزاننده دستگاه
(NotificationCompat.Builder setWhen (long when
تنظیم زمانی که رویداد اتفاق می افتد. نوتیفیکیشن ها در پنل در این زمان؛ ذخیره می شوند.
مثال
مثال زیر عملکرد اعلان اندروید را با استفاده از NotificationCompat.Builder Class که در Android 4.1 معرفی شده نشان می دهد.
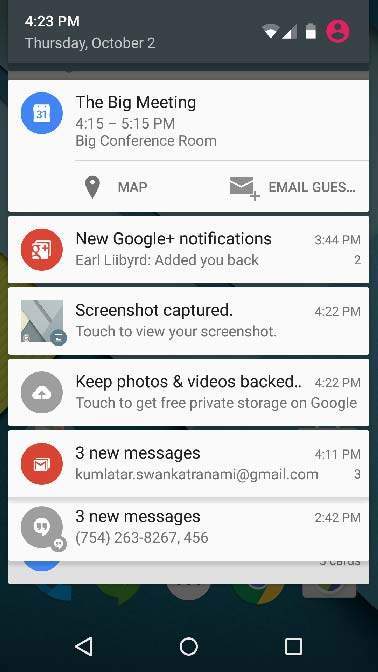
1 شما برای ایجاد یک برنامه Android از Android studio IDE استفاده خواهید کرد و نام آن را به عنوان tutorialspoint تحت یک بسته com.example.notificationdemo نامگذاری می کنید.
2 پرونده src / MainActivity.java را تغییر دهید و کد را برای اطلاع (“”) اضافه کنید ، اگر کاربر روی دکمه کلیک کند، سرویس نوتیفیکیشن اندروید فراخوانی می شود.
3 یک فایل جاوا جدید src / NotificationView.java ایجاد کنید ، که برای نمایش طرح جدید به عنوان بخشی از فعالیت جدید مورد استفاده قرار می گیرد که با کلیک کاربر بر روی هر یک از نوتیفیکیشن ها شروع می شود
4 طرح XML فایل res / layout / activity_main.xml را تغییر دهید تا دکمه نوتیفیکیشن را در طرح بندی نسبی اضافه کنید.
5 طرح XML فایل res / layout / notification.xml جدید را ایجاد کنید. این به عنوان پرونده طرح برای فعالیت جدید استفاده می شود که با شروع کلیک کاربر بر روی هرکدام از اعلان ها شروع می شود.
6 نیازی به تغییر ثابتهای رشته پیش فرض نیست. Android studio از ثابتهای رشته ای پیش فرض محافظت می کند
7 برای راه اندازی شبیه ساز اندروید و تأیید نتیجه تغییرات انجام شده در برنامه ، برنامه را اجرا کنید.
در زیر محتوای پرونده فعالیت اصلی تغییر یافته src / com.example.notificationdemo / MainActivity.java است. این پرونده می تواند شامل هر یک از روشهای اساسی چرخه حیات باشد.
|
1 2 3 4 5 6 7 8 9 10 11 12 13 14 15 16 17 18 19 20 21 22 23 24 25 26 27 28 29 30 31 32 33 34 35 36 37 38 39 40 41 42 43 44 45 |
package com.example.notificationdemo; import android.app.Activity; import android.app.NotificationManager; import android.app.PendingIntent; import android.content.Context; import android.content.Intent; import android.support.v4.app.NotificationCompat; import android.os.Bundle; import android.view.View; import android.widget.Button; public class MainActivity extends Activity { Button b1; @Override protected void onCreate(Bundle savedInstanceState) { super.onCreate(savedInstanceState); setContentView(R.layout.activity_main); b1 = (Button)findViewById(R.id.button); b1.setOnClickListener(new View.OnClickListener() { @Override public void onClick(View v) { addNotification(); } }); } private void addNotification() { NotificationCompat.Builder builder = new NotificationCompat.Builder(this) .setSmallIcon(R.drawable.abc) .setContentTitle("Notifications Example") .setContentText("This is a test notification"); Intent notificationIntent = new Intent(this, MainActivity.class); PendingIntent contentIntent = PendingIntent.getActivity(this, 0, notificationIntent, PendingIntent.FLAG_UPDATE_CURRENT); builder.setContentIntent(contentIntent); // Add as notification NotificationManager manager = (NotificationManager) getSystemService(Context.NOTIFICATION_SERVICE); manager.notify(0, builder.build()); } } |
در زیر محتوای پرونده res / layout / notification.xml وجود دارد –
|
1 2 3 4 5 6 7 8 9 10 11 |
<?xml version="1.0" encoding="utf-8"?> <LinearLayout xmlns:android="http://schemas.android.com/apk/res/android" android:orientation="vertical" android:layout_width="fill_parent" android:layout_height="fill_parent" > <TextView android:layout_width="fill_parent" android:layout_height="400dp" android:text="Hi, Your Detailed notification view goes here...." /> </LinearLayout> |
در زیر محتوای پرونده activity اصلی تغییر یافته src / com.example.notificationdemo / NotificationView.java است..
|
1 2 3 4 5 6 7 8 9 10 11 12 |
package com.example.notificationdemo; import android.os.Bundle; import android.app.Activity; public class NotificationView extends Activity{ @Override public void onCreate(Bundle savedInstanceState){ super.onCreate(savedInstanceState); setContentView(R.layout.notification); } } |
در زیر محتوای پرونده res / layout / activity_main.xml وجود دارد –
|
1 2 3 4 5 6 7 8 9 10 11 12 13 14 15 16 17 18 19 20 21 22 23 24 25 26 27 28 29 30 31 32 33 34 35 36 37 38 39 40 41 42 43 44 45 46 47 48 49 |
<RelativeLayout xmlns:android="http://schemas.android.com/apk/res/android" xmlns:tools="http://schemas.android.com/tools" android:layout_width="match_parent" android:layout_height="match_parent" android:paddingBottom="@dimen/activity_vertical_margin" android:paddingLeft="@dimen/activity_horizontal_margin" android:paddingRight="@dimen/activity_horizontal_margin" android:paddingTop="@dimen/activity_vertical_margin" tools:context="MainActivity"> <TextView android:id="@+id/textView1" android:layout_width="wrap_content" android:layout_height="wrap_content" android:text="Notification Example" android:layout_alignParentTop="true" android:layout_centerHorizontal="true" android:textSize="30dp" /> <TextView android:id="@+id/textView2" android:layout_width="wrap_content" android:layout_height="wrap_content" android:text="Tutorials point " android:textColor="#ff87ff09" android:textSize="30dp" android:layout_below="@+id/textView1" android:layout_centerHorizontal="true" android:layout_marginTop="48dp" /> <ImageButton android:layout_width="wrap_content" android:layout_height="wrap_content" android:id="@+id/imageButton" android:src="@drawable/abc" android:layout_below="@+id/textView2" android:layout_centerHorizontal="true" android:layout_marginTop="42dp" /> <Button android:layout_width="wrap_content" android:layout_height="wrap_content" android:text="Notification" android:id="@+id/button" android:layout_marginTop="62dp" android:layout_below="@+id/imageButton" android:layout_centerHorizontal="true" /> </RelativeLayout> |
در زیر محتوای res / values / strings.xml برای تعریف دو ثابت جدید وجود دارد –
|
1 2 3 4 5 |
<?xml version="1.0" encoding="utf-8"?> <resources> <string name="action_settings">Settings</string> <string name="app_name">tutorialspoint </string> </resources> |
در زیر محتوای پیش فرض AndroidManifest.xml آمده است –
|
1 2 3 4 5 6 7 8 9 10 11 12 13 14 15 16 17 18 19 20 21 22 23 24 25 26 27 28 29 30 31 |
<?xml version="1.0" encoding="utf-8"?> <manifest xmlns:android="http://schemas.android.com/apk/res/android" package="com.example.notificationdemo" > <application android:allowBackup="true" android:icon="@drawable/ic_launcher" android:label="@string/app_name" android:theme="@style/AppTheme" > <activity android:name="com.example.notificationdemo.MainActivity" android:label="@string/app_name" > <intent-filter> <action android:name="android.intent.action.MAIN" /> <category android:name="android.intent.category.LAUNCHER" /> </intent-filter> </activity> <activity android:name=".NotificationView" android:label="Details of notification" android:parentActivityName=".MainActivity"> <meta-data android:name="android.support.PARENT_ACTIVITY" android:value=".MainActivity"/> </activity> </application> </manifest> |
بیایید برنامه خود را اجرا کنیم! من تصور می کنم شما AVD خود را هنگام راه اندازی محیط ایجاد کرده اید. برای اجرای برنامه از Android studio، یکی از پرونده های فعالیت پروژه خود را باز کنید و از نوار ابزار روی  کلیک کنید. Android Studio برنامه را روی AVD شما نصب کرده و شروع به کار می کند و اگر با تنظیمات و برنامه هایتان همه چیز خوب باشد، زیر پنجره شبیه ساز نمایش داده می شود.
اکنون اگر روی button کلیک کنید؛ خواهید دید که در بالای صفحه؛ یک پیام “New Message Alert!” (هشدار پیام جدید!) برای لحظه ای نمایش داده می شود و پس از آن صفحه زیر را خواهید داشت که دارای یک نماد کوچک در گوشه بالا سمت چپ است.
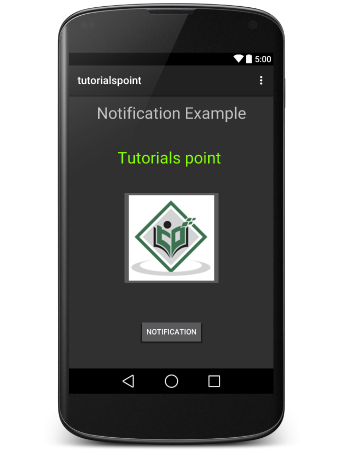
حالا view را گسترش دهیم ، روی نماد کوچک کلیک طولانی کنیم ، بعد از یک ثانیه اطلاعات تاریخ نمایش داده می شود و این زمانی است که شما باید نوار وضعیت را بدون این که از وضعیت کلیک خارج شوید؛ به پایین بکشید. خواهید دید که نوار وضعیت گسترش خواهد یافت و صفحه زیر را دریافت خواهید کرد:
نمایش کامل نوتیفیکیشن
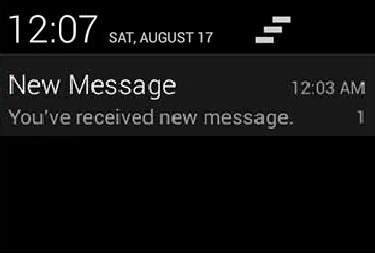
قطعه کد زیر نحوه تغییر نوتیفیکیشن ایجاد شده قبلی را می توان در استایل نمایش کامل اینباکس استفاده کرد. برای نمایش این قابلیت، متد مادیفای شده () displayNotification را به روز کنیم.
|
1 2 3 4 5 6 7 8 9 10 11 12 13 14 15 16 17 18 19 20 21 22 23 24 25 26 27 28 29 30 31 32 33 34 35 36 37 38 39 40 41 42 43 44 45 46 47 48 49 50 51 |
protected void displayNotification() { Log.i("Start", "notification"); /* Invoking the default notification service */ NotificationCompat.Builder mBuilder = new NotificationCompat.Builder(this); mBuilder.setContentTitle("New Message"); mBuilder.setContentText("You've received new message."); mBuilder.setTicker("New Message Alert!"); mBuilder.setSmallIcon(R.drawable.woman); /* Increase notification number every time a new notification arrives */ mBuilder.setNumber(++numMessages); /* Add Big View Specific Configuration */ NotificationCompat.InboxStyle inboxStyle = new NotificationCompat.InboxStyle(); String[] events = new String[6]; events[0] = new String("This is first line...."); events[1] = new String("This is second line..."); events[2] = new String("This is third line..."); events[3] = new String("This is 4th line..."); events[4] = new String("This is 5th line..."); events[5] = new String("This is 6th line..."); // Sets a title for the Inbox style big view inboxStyle.setBigContentTitle("Big Title Details:"); // Moves events into the big view for (int i=0; i < events.length; i++) { inboxStyle.addLine(events[i]); } mBuilder.setStyle(inboxStyle); /* Creates an explicit intent for an Activity in your app */ Intent resultIntent = new Intent(this, NotificationView.class); TaskStackBuilder stackBuilder = TaskStackBuilder.create(this); stackBuilder.addParentStack(NotificationView.class); /* Adds the Intent that starts the Activity to the top of the stack */ stackBuilder.addNextIntent(resultIntent); PendingIntent resultPendingIntent =stackBuilder.getPendingIntent(0,PendingIntent.FLAG_UPDATE_CURRENT); mBuilder.setContentIntent(resultPendingIntent); mNotificationManager = (NotificationManager) getSystemService(Context.NOTIFICATION_SERVICE); /* notificationID allows you to update the notification later on. */ mNotificationManager.notify(notificationID, mBuilder.build()); } |
اکنون اگر سعی کنید برنامه خود را اجرا کنید ، نتیجه زیر را در شکل گسترش یافته مشاهده خواهید کرد –
لیست جلسات قبل آموزش برنامه نویسی اندروید
- نگاهی کلی به برنامه نویسی اندروید
- تنظیمات محیط در برنامه نویسی اندروید
- معماری برنامه نویسی اندروید
- اجزای برنامه در برنامه نویسی اندروید
- Hello World در برنامه نویسی اندروید
- سازماندهی و دسترسی به منابع در برنامه نویسی اندروید
- فعالیت در برنامه نویسی اندروید
- سرویس در برنامه نویسی اندروید
- گیرنده های پخش در برنامه نویسی اندروید
- ارائه دهنده محتوا در برنامه نویسی اندروید
- قطعات در برنامه نویسی اندروید
- Intent و فیلتر در برنامه نویسی اندروید
- طرح بندی رابط کاربری در برنامه نویسی اندروید
- کنترل های رابط کاربری در برنامه نویسی اندروید
- مدیریت رویدادها در برنامه نویسی اندروید
- استایل و تم ها در برنامه نویسی اندروید
- اجزای سفارشی در برنامه نویسی اندروید
- کشیدن و رها کردن در برنامه نویسی اندروید


.svg)
دیدگاه شما