
آموزش نحو در گوگل AMP
آموزش نحو در گوگل AMP
در این درس از مجموعه آموزش برنامه نویسی سایت سورس باران، به آموزش نحو در گوگل AMP خواهیم پرداخت.
در این درس، ما درباره شرایط اولیه برای شروع کار با صفحات Google AMP بحث خواهیم کرد.
مثال صفحه AMP
یک مثال اساسی برای یک صفحه AMP در زیر نشان داده شده است –
|
1 2 3 4 5 6 7 8 9 10 11 12 13 14 15 16 17 18 19 20 21 22 23 24 25 26 27 28 29 30 31 32 33 34 35 36 37 38 39 40 41 42 43 44 45 46 47 48 49 50 51 |
<!doctype html> <html amp> <head> <meta charset = "utf-8"> <title>Amp Sample Page</title> <link rel = "canonical" href = "./regular-html-version.html"> <meta name = "viewport" content = "width = device-width, minimum-scale = 1,initial-scale = 1"> <style amp-custom> h1 {color: red} </style> <style amp-boilerplate> body{ -webkit-animation: -amp-start 8s steps(1,end) 0s 1 normal both;-moz-animation: -amp-start 8s steps(1,end) 0s 1 normal both;-ms-animation: -amp-start 8s steps(1,end) 0s 1 normal both;animation: -amp-start 8s steps(1,end) 0s 1 normal both } @-webkit-keyframes -amp-start{from{visibility:hidden}to{visibility:visible}}@-moz-keyframes -amp-start{from{visibility:hidden}to{visibility:visible}}@-ms-keyframes -amp-start{from{visibility:hidden}to{visibility:visible}}@-o-keyframes -amp-start{from{visibility:hidden}to{visibility:visible}}@keyframes -amp-start{from{visibility:hidden}to{visibility:visible}} </style> <noscript> <style amp-boilerplate> body{ -webkit-animation:none; -moz-animation:none; -ms-animation:none; animation:none} </style> </noscript> <script async src = "https://cdn.ampproject.org/v0.js"> </script> </head> <body> <h1>Amp Sample Page</h1> <p> <amp-img src = "images/christmas1.jpg" width = "300" height = "300" layout = "responsive"> </amp-img> </p> </body> </html> |
تگ های اجباری
برخی از تگ های اجباری وجود دارد که باید در یک صفحه AMP گنجانده شوند. این بخش به طور مفصل درباره آنها بحث می کند –
باید اطمینان حاصل کنیم که AMP یا ⚡ را به تگ html اضافه می کنیم همانطور که در زیر نشان داده شده است
|
1 2 3 |
<html amp> OR <html ⚡> |
- ما باید تگ<head> و <body> را به صفحه html اضافه کنیم.
در صورت از دست دادن هر یک از تگ های اجباری اجباری ، اعتبارسنجی AMP ممکن است خراب شود. برخی از تگ های اجباری mets که قرار است در قسمت بالای صفحه اضافه شوند در اینجا نشان داده شده اند –
|
1 2 3 4 5 |
<meta charset="utf-8"> <meta name = "viewport" content = "width = device-width, minimum-scale = 1, initial-scale = 1"> |
- پیوند rel = “canonical” برای افزودن به داخل تگ head
|
1 |
<link rel = "canonical" href = "./regular-html-version.html"> |
- تگ سبک AMP با amp-boilerplate
|
1 2 3 4 5 6 7 8 9 10 11 12 13 14 15 |
<style amp-boilerplate> body{ -webkit-animation: -amp-start 8s steps(1,end) 0s 1 normal both;-moz-animation: -amp-start 8s steps(1,end) 0s 1 normal both;-ms-animation: -amp-start 8s steps(1,end) 0s 1 normal both;animation: -amp-start 8s steps(1,end) 0s 1 normal both } @-webkit-keyframes -amp-start{from{visibility:hidden}to{visibility:visible}}@-moz-keyframes -amp-start{from{visibility:hidden}to{visibility:visible}}@-ms-keyframes -amp-start{from{visibility:hidden}to{visibility:visible}}@-o-keyframes -amp-start{from{visibility:hidden}to{visibility:visible}}@keyframes -amp-start{from{visibility:hidden}to{visibility:visible}} </style> |
تگ اسکریپت AMP با async مانند آن در زیر به آن اضافه شده است. این مهمترین تگ از همه است –
|
1 2 |
<script async src = "https://cdn.ampproject.org/v0.js"> </script> |
اگر می خواهید css سفارشی به صفحه اضافه کنید ، باید از این تگ استفاده کنید. لطفاً در اینجا یادداشت کنید ، ما نمی توانیم سبک خارجی را در صفحات AMP فراخوانی کنیم. برای افزودن css سفارشی ، تمام css های شما باید به اینجا بروند –
|
1 2 3 |
<style amp-custom> //all your styles here </style> |
می توانید صفحه فوق را در مرورگر خود با استفاده از # developement = 1 در انتهای url صفحه اعتبارسنجی کنید.
حال اجازه دهید همان را در مرورگر آزمایش کنیم. من این صفحه را به صورت محلی میزبانی کرده و آن را به عنوان amppage.html ذخیره کرده ام.
آدرس اینترنتی برای آزمایش بالاتر است
http: //localhost/googleamp/amppage.html#development=1
مثال
|
1 2 3 4 5 6 7 8 9 10 11 12 13 14 15 16 17 18 19 20 21 22 23 24 25 26 27 28 29 30 31 32 33 34 35 36 37 38 39 40 41 42 43 44 45 46 47 48 49 50 51 |
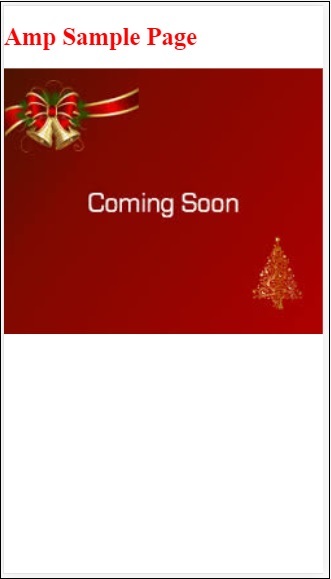
<!doctype html> <html amp> <head> <meta charset = "utf-8"> <title>Amp Sample Page</title> <link rel = "canonical" href = "./regular-html-version.html"> <meta name = "viewport" content = "width=device-width, minimum-scale = 1,initial-scale = 1"> <styl e amp-custom> h1 {color: red} </style> <style amp-boilerplate> body{ -webkit-animation: -amp-start 8s steps(1,end) 0s 1 normal both;-moz-animation: -amp-start 8s steps(1,end) 0s 1 normal both;-ms-animation: -amp-start 8s steps(1,end) 0s 1 normal both;animation: -amp-start 8s steps(1,end) 0s 1 normal both } @-webkit-keyframes -amp-start{from{visibility:hidden}to{visibility:visible}}@-moz-keyframes -amp-start{from{visibility:hidden}to{visibility:visible}}@-ms-keyframes -amp-start{from{visibility:hidden}to{visibility:visible}}@-o-keyframes -amp-start{from{visibility:hidden}to{visibility:visible}}@keyframes -amp-start{from{visibility:hidden}to{visibility:visible}} </style> <noscript> <style amp-boilerplate> body{ -webkit-animation:none; -moz-animation:none; -ms-animation:none; animation:none} </style> </noscript> <script async src = "https://cdn.ampproject.org/v0.js"> </script> </head> <body> <h1>Amp Sample Page</h1> <p> <amp-img src = "images/christmas1.jpg" width = "300" height = "250" layout = "responsive"> </amp-img> </p> </body> </html> |
خروجی
لیست جلسات قبل آموزش گوگل AMP
- آموزش گوگل AMP
- بررسی اجمالی گوگل AMP
- مقدمه گوگل AMP
- آموزش تصاویر در گوگل AMP
- آموزش فرم در گوگل AMP
- آموزش Iframes در گوگل AMP
- آموزش ویدیو در گوگل AMP
- آموزش دکمه در گوگل AMP
- آموزش Timeago در گوگل AMP
- آموزش Mathml در گوگل AMP
- آموزش تگ Fit Text در گوگل AMP
- آموزش شمارش معکوس تاریخ در گوگل AMP
- آموزش انتخاب کننده تاریخ در گوگل AMP
- آموزش استوری در گوگل AMP
- آموزش انتخاب کننده در گوگل AMP
- آموزش لینک در گوگل AMP
- آموزش فونت در گوگل AMP
- آموزش لیست در گوگل AMP
- آموزش اعلان کاربر در گوگل AMP
- آموزش next page در گوگل AMP
- آموزش ویژگی ها در گوگل AMP
- آموزش استایل ها و CSS سفارشی در گوگل AMP
- آموزش کلاس های CSS پویا در گوگل AMP
- آموزش اکشن ها و رویدادها در گوگل AMP
- آموزش انیمیشن در گوگل AMP
- آموزش اتصال داده در گوگل AMP
- آموزش طرح بندی در گوگل AMP
- آموزش تبلیغات در گوگل AMP
- آموزش تجزیه و تحلیل در گوگل AMP
- آموزش ویجت های اجتماعی در گوگل AMP
- آموزش نحو در گوگل AMP
- آموزش اعتبار سنجی در گوگل AMP
- آموزش اجزا جاوا اسکریپت در گوگل AMP


.svg)
دیدگاه شما