
آموزش ویجت های اجتماعی در گوگل AMP
آموزش ویجت های اجتماعی در گوگل AMP
در این درس از مجموعه آموزش برنامه نویسی سایت سورس باران، به آموزش ویجت های اجتماعی در گوگل AMP خواهیم پرداخت.
Amp پشتیبانی از ویجت های اجتماعی موجود در صفحه را بدون نیاز به بارگیری کتابخانه خارجی فراهم می کند. در این درس، ما در مورد برخی از ابزارک های محبوب اجتماعی ذکر شده در اینجا بحث خواهیم کرد –
- Google AMP – فیس بوک
- Google AMP – توییتر
- Google AMP – پینترست
Google Amp – فیس بوک
با استفاده از مولفه amp-facebook ، می توانیم به فیس بوک متصل شویم و پست، ویدئو، نظر را در یک صفحه آمپ نمایش دهیم.
برای استفاده از amp-facebook، باید اسکریپت زیر را به صفحه اضافه کنیم –
|
1 2 3 |
<script async custom-element = "amp-facebook" src = "https://cdn.ampproject.org/v0/amp-facebook-0.1.js"> </script> |
فرمت تگ amp-facebook
|
1 2 3 4 5 6 7 |
<amp-facebook width = "552" height = "310" layout = "responsive" data-href = "https://www.facebook.com/tutorialspointindia/ posts/1784197988358159"> </amp-facebook> |
یک مثال مفید برای amp-facebook در اینجا نشان داده شده است –
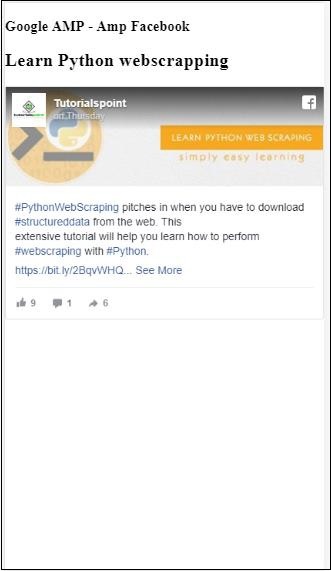
مثال: نمایش پست از فیس بوک
|
1 2 3 4 5 6 7 8 9 10 11 12 13 14 15 16 17 18 19 20 21 22 23 24 25 26 27 28 29 30 31 32 33 34 35 36 37 38 39 40 41 42 43 44 45 46 47 48 49 50 51 |
<!doctype html> <html amp lang = "en"> <head> <meta charset = "utf-8"> <script async src = "https://cdn.ampproject.org/v0.js"> </script> <title>Google AMP - Amp Facebook</title> <link rel = "canonical" href = "http://example.ampproject.org/article-metadata.html"> <meta name = "viewport" content = "width = device-width, minimum-scale = 1,initial-scale = 1"> <style amp-boilerplate> body{ -webkit-animation: -amp-start 8s steps(1,end) 0s 1 normal both;-moz-animation: -amp-start 8s steps(1,end) 0s 1 normal both;-ms-animation: -amp-start 8s steps(1,end) 0s 1 normal both;animation: -amp-start 8s steps(1,end) 0s 1 normal both } @-webkit-keyframes -amp-start{from{visibility:hidden}to{visibility:visible}}@-moz-keyframes -amp-start{from{visibility:hidden}to{visibility:visible}}@-ms-keyframes -amp-start{from{visibility:hidden}to{visibility:visible}}@-o-keyframes -amp-start{from{visibility:hidden}to{visibility:visible}}@keyframes -amp-start{from{visibility:hidden}to{visibility:visible}} </style> <noscript> <style amp-boilerplate> body{ -webkit-animation:none; -moz-animation:none; -ms-animation:none; animation:none} </style> </noscript> <script async custom-element = "amp-facebook" src = "https://cdn.ampproject.org/v0/amp-facebook-0.1.js"> </script> </head> <body> <h3>Google AMP - Amp Facebook</h3> <h2>Learn Python webscrapping</h2> <amp-facebook width = "552" height = "310" layout = "responsive" data-href = "https://www.facebook.com/tutorialspointindia/posts/1784197988358159"> </amp-facebook> </body> </html> |
خروجی
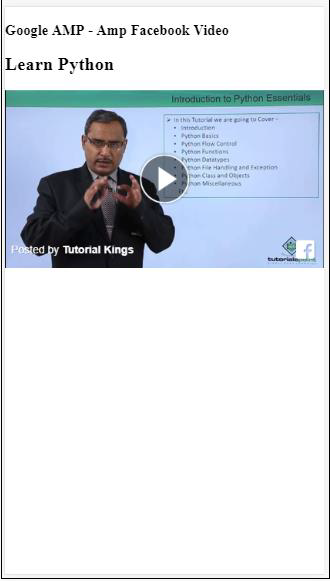
مثال: نمایش فیلم از فیس بوک
|
1 2 3 4 5 6 7 8 9 10 11 12 13 14 15 16 17 18 19 20 21 22 23 24 25 26 27 28 29 30 31 32 33 34 35 36 37 38 39 40 41 42 43 44 45 46 47 48 49 50 51 52 |
<!doctype html> <html amp lang = "en"> <head> <meta charset = "utf-8"> <script async src = "https://cdn.ampproject.org/v0.js"> </script> <title>Google AMP - Amp Facebook>/title> <link rel = "canonical" href = "http://example.ampproject.org/article-metadata.html"> <meta name = "viewport" content = "width = device-width, minimum-scale = 1,initial-scale = 1"> <style amp-boilerplate> body{ -webkit-animation: -amp-start 8s steps(1,end) 0s 1 normal both;-moz-animation: -amp-start 8s steps(1,end) 0s 1 normal both;-ms-animation: -amp-start 8s steps(1,end) 0s 1 normal both;animation: -amp-start 8s steps(1,end) 0s 1 normal both } @-webkit-keyframes -amp-start{from{visibility:hidden}to{visibility:visible}}@-moz-keyframes -amp-start{from{visibility:hidden}to{visibility:visible}}@-ms-keyframes -amp-start{from{visibility:hidden}to{visibility:visible}}@-o-keyframes -amp-start{from{visibility:hidden}to{visibility:visible}}@keyframes -amp-start{from{visibility:hidden}to{visibility:visible}} </style> <noscript> <style amp-boilerplate> body{ -webkit-animation:none; -moz-animation:none; -ms-animation:none; animation:none} </style> </noscript> <script async custom-element = "amp-facebook" src = "https://cdn.ampproject.org/v0/amp-facebook-0.1.js"> </script> </head> <body> <h3<Google AMP - Amp Facebook Video</h3> <h2<Learn Python</h2> <amp-facebook width = "476" height = "316" layout = "responsive" data-embed-as = "video" data-href = "https://www.facebook.com/thetutorialkings/videos/701545820223256"> </amp-facebook> </body> </html> |
خروجی
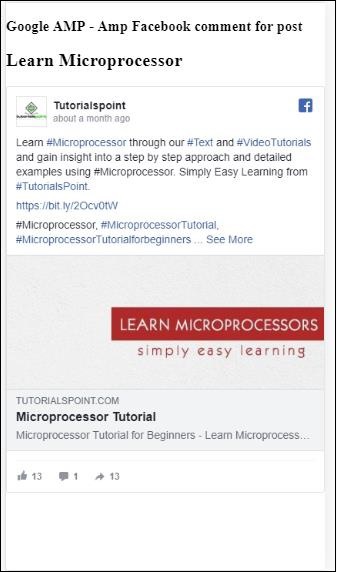
مثال: نمایش نظرات برای یک پست در فیس بوک
|
1 2 3 4 5 6 7 8 9 10 11 12 13 14 15 16 17 18 19 20 21 22 23 24 25 26 27 28 29 30 31 32 33 34 35 36 37 38 39 40 41 42 43 44 45 46 47 48 49 50 51 52 53 |
<!doctype html> <html amp lang = "en"> <head> <meta charset = "utf-8"> <script async src = "https://cdn.ampproject.org/v0.js"> </script> <title>Google AMP - Amp Facebook</title> <link rel = "canonical" href = "http://example.ampproject.org/article-metadata.html"> <meta name = "viewport" content = "width = device-width, minimum-scale = 1,initial-scale = 1"> <style amp-boilerplate> body{ -webkit-animation: -amp-start 8s steps(1,end) 0s 1 normal both;-moz-animation: -amp-start 8s steps(1,end) 0s 1 normal both;-ms-animation: -amp-start 8s steps(1,end) 0s 1 normal both;animation: -amp-start 8s steps(1,end) 0s 1 normal both } @-webkit-keyframes -amp-start{from{visibility:hidden}to{visibility:visible}}@-moz-keyframes -amp-start{from{visibility:hidden}to{visibility:visible}}@-ms-keyframes -amp-start{from{visibility:hidden}to{visibility:visible}}@-o-keyframes -amp-start{from{visibility:hidden}to{visibility:visible}}@keyframes -amp-start{from{visibility:hidden}to{visibility:visible}} </style> <noscript> <style amp-boilerplate> body{ -webkit-animation:none; -moz-animation:none; -ms-animation:none; animation:none} </style> </noscript> <script async custom-element = "amp-facebook" src = "https://cdn.ampproject.org/v0/amp-facebook-0.1.js"> </script> </head> <body> <h3>Google AMP - Amp Facebook comment for post</h3> <h2>Learn Microprocessor</h2> <amp-facebook width = "552" height = "500" layout = "responsive" data-embed-type = "comment" data-href = "https://www.facebook.com/tutorialspointindia/posts/1744145745696717? comment_id=1744179789026646&include_parent=false"> </amp-facebook> </body> </html> |
خروجی
ویژگی های موجود در amp-facebook عبارتند از:
- data-href (اجباری) – در اینجا شما باید آدرس فیس بوک را مشخص کنید.
- data-embed-as− گزینه های موجود عبارتند از ارسال ، فیلم و نظر. به طور پیش فرض ، پست است.
- data-locale (اجباری) – این صفحه نمایش را به زبان محلی نشان می دهد ، شما می توانید آن را طبق انتخاب خود تغییر دهید.
- data-include-comment-parent− مقادیر درست یا نادرست را می گیرد. به طور پیش فرض نادرست است. وقتی از گزینه data-embed-as به عنوان نظر استفاده می کنید ، درصورت نیاز به پاسخ والدین به نظر ، می توانید این گزینه را درست تنظیم کنید.
تا کنون نحوه افزودن پست / فیلم و نظر دادن به صفحه آمپر را مشاهده کرده ایم. درصورت نیاز به افزودن صفحه فیس بوک ، amp یک جز به نام amp-facebook-page دارد.
پلاگین صفحه amp facebook
جز Amp-facebook-page جزئیات صفحه facebook را که می خواهیم به ما می دهد. برای کار با صفحه amp-facebook ، باید اسکریپت زیر را اضافه کنیم –
|
1 2 3 |
<script async custom-element = "amp-facebook-page" src = " https://cdn.ampproject.org/v0/amp-facebook-page-0.1.js"> </script> |
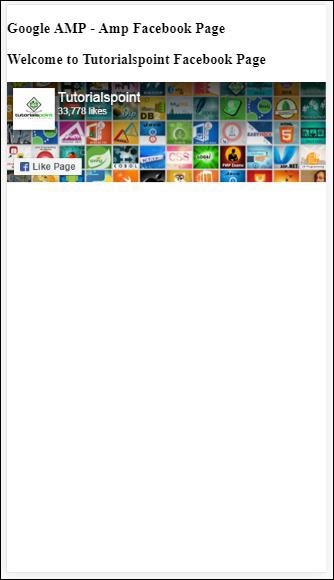
یک مثال مفید با استفاده از amp-facebook-page در اینجا نشان داده شده است –
مثال
|
1 2 3 4 5 6 7 8 9 10 11 12 13 14 15 16 17 18 19 20 21 22 23 24 25 26 27 28 29 30 31 32 33 34 35 36 37 38 39 40 41 42 43 44 45 46 47 48 49 50 51 |
<!doctype html> <html amp lang = "en"> <head> <meta charset = "utf-8"> <script async src = "https://cdn.ampproject.org/v0.js"> </script> <title>Google AMP - Amp Facebook</title> <link rel = "canonical" href = "http://example.ampproject.org/article-metadata.html"> <meta name = "viewport" content = "width = device-width, minimum-scale = 1,initial-scale = 1"> <style amp-boilerplate> body{ -webkit-animation: -amp-start 8s steps(1,end) 0s 1 normal both;-moz-animation: -amp-start 8s steps(1,end) 0s 1 normal both;-ms-animation: -amp-start 8s steps(1,end) 0s 1 normal both;animation: -amp-start 8s steps(1,end) 0s 1 normal both } @-webkit-keyframes -amp-start{from{visibility:hidden}to{visibility:visible}}@-moz-keyframes -amp-start{from{visibility:hidden}to{visibility:visible}}@-ms-keyframes -amp-start{from{visibility:hidden}to{visibility:visible}}@-o-keyframes -amp-start{from{visibility:hidden}to{visibility:visible}}@keyframes -amp-start{from{visibility:hidden}to{visibility:visible}} </style> <noscript> <style amp-boilerplate> body{ -webkit-animation:none; -moz-animation:none; -ms-animation:none; animation:none} </style> </noscript> <script async custom-element = "amp-facebook-page" src = "https://cdn.ampproject.org/v0/amp-facebook-page-0.1.js"> </script> </head> <body> <h3>Google AMP - Amp Facebook Page</h3> <h3>Welcome to Tutorialspoint Facebook Page</h3> <amp-facebook-page width = "340" height = "130" layout = "responsive" data-href = "https://www.facebook.com/tutorialspointindia/"> </amp-facebook-page> </body> </html> |
خروجی
Amp-facebook-like
برای تعبیه صفحه فیس بوک مانند دکمه پلاگین، می توانیم از مولفه amp-facebook-like استفاده کنیم. برای کار با amp-facebook-like ، باید اسکریپت زیر را اضافه کنیم –
|
1 2 3 |
"<script async custom-element = "amp-facebook-like" src = "https://cdn.ampproject.org/v0/amp-facebook-like-0.1.js"> </script> |
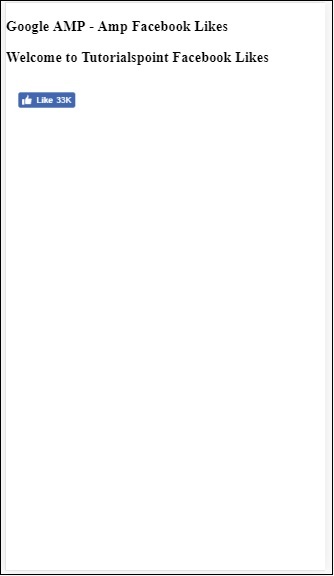
مثال
|
1 2 3 4 5 6 7 8 9 10 11 12 13 14 15 16 17 18 19 20 21 22 23 24 25 26 27 28 29 30 31 32 33 34 35 36 37 38 39 40 41 42 43 44 45 46 47 48 49 50 51 52 53 54 55 56 57 |
<!doctype html> <html amp lang = "en"> <head> <meta charset = "utf-8"> <script async src = "https://cdn.ampproject.org/v0.js"> </script> <title>Google AMP - Amp Facebook</title> <link rel = "canonical" href = "http://example.ampproject.org/article-metadata.html"> <meta name = "viewport" content = "width = device-width, minimum-scale = 1,initial-scale = 1"> <style amp-boilerplate> body{ -webkit-animation: -amp-start 8s steps(1,end) 0s 1 normal both;-moz-animation: -amp-start 8s steps(1,end) 0s 1 normal both;-ms-animation: -amp-start 8s steps(1,end) 0s 1 normal both;animation: -amp-start 8s steps(1,end) 0s 1 normal both } @-webkit-keyframes -amp-start{from{visibility:hidden}to{visibility:visible}}@-moz-keyframes -amp-start{from{visibility:hidden}to{visibility:visible}}@-ms-keyframes -amp-start{from{visibility:hidden}to{visibility:visible}}@-o-keyframes -amp-start{from{visibility:hidden}to{visibility:visible}}@keyframes -amp-start{from{visibility:hidden}to{visibility:visible}} </style> <noscript> <style amp-boilerplate> body{ -webkit-animation:none; -moz-animation:none; -ms-animation:none; animation:none} </style> </noscript> <script async custom-element = "amp-facebook-like" src = "https://cdn.ampproject.org/v0/amp-facebook-like-0.1.js"> </script> <style amp-custom> amp-facebook-like { margin: 1rem } </style> </head> <body> <h3>Google AMP - Amp Facebook Likes</h3> <h3>Welcome to Tutorialspoint Facebook Likes</h3> <amp-facebook-like width = "110" height = "20" layout = "fixed" data-layout = "button_count" data-href = "https://www.facebook.com/tutorialspointindia"> </amp-facebook-like> </body> </html> |
خروجی
پلاگین Amp-facebook-comments
مولفه Amp-facebook-comments نظرات صفحه داده شده را ارائه می دهد.
برای کار با amp-facebook-comments ، باید اسکریپت زیر را اضافه کنیم –
|
1 2 3 |
<script async custom-element = "amp-facebook-comments" src = "https://cdn.ampproject.org/v0/amp-facebook-comments-0.1.js"> </script> |
مثال
|
1 2 3 4 5 6 7 8 9 10 11 12 13 14 15 16 17 18 19 20 21 22 23 24 25 26 27 28 29 30 31 32 33 34 35 36 37 38 39 40 41 42 43 44 45 46 47 48 49 50 51 52 53 54 55 56 |
<!doctype html> <html amp lang = "en"> <head> <meta charset = "utf-8"> <script async src = "https://cdn.ampproject.org/v0.js"> </script> <title>Google AMP - Amp Facebook</title> <link rel = "canonical" href = "http://example.ampproject.org/article-metadata.html"> <meta name = "viewport" content = "width = device-width, minimum-scale = 1,initial-scale = 1"> <style amp-boilerplate> body{ -webkit-animation: -amp-start 8s steps(1,end) 0s 1 normal both;-moz-animation: -amp-start 8s steps(1,end) 0s 1 normal both;-ms-animation: -amp-start 8s steps(1,end) 0s 1 normal both;animation: -amp-start 8s steps(1,end) 0s 1 normal both } @-webkit-keyframes -amp-start{from{visibility:hidden}to{visibility:visible}}@-moz-keyframes -amp-start{from{visibility:hidden}to{visibility:visible}}@-ms-keyframes -amp-start{from{visibility:hidden}to{visibility:visible}}@-o-keyframes -amp-start{from{visibility:hidden}to{visibility:visible}}@keyframes -amp-start{from{visibility:hidden}to{visibility:visible}} </style> <noscript> <style amp-boilerplate> body{ -webkit-animation:none; -moz-animation:none; -ms-animation:none; animation:none} </style> </noscript> <script async custom-element = "amp-facebook-comments" src = "https://cdn.ampproject.org/v0/amp-facebook-comments-0.1.js"> </script> <style amp-custom> amp-facebook-like { margin: 1rem } </style> </head> <body> <h3>Google AMP - Amp Facebook Likes</h3> <amp-facebook-comments width = 486 height = 657 layout = "responsive" data-numposts = "2" data-href = "https://developers.facebook.com/docs/plugins/comments"> </amp-facebook-comments> </body> </html> |
خروجی
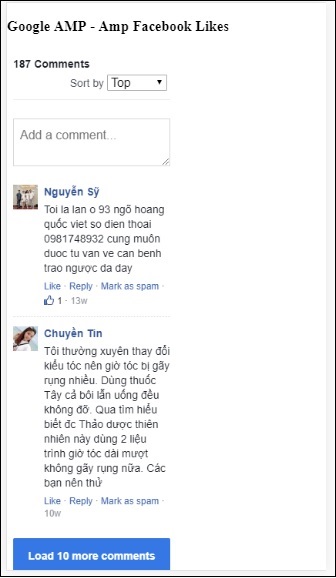
Attribute data-numpost تعداد تصمیمات نمایش داده شده در صفحه را تعیین می کند. اگر می خواهید همه نظرات را دریافت کنید، می توانید ویژگی را حذف کنید.
Google AMP – پینترست
Amp ویجت pinterest را با استفاده از مولفه amp-pinterest فراهم می کند. ما می توانیم از این مولفه برای نشان دادن ویجت pinterest، دکمه ذخیره pinterest و دکمه follow pinterest استفاده کنیم.
برای شروع کار با amp-pinterest ، باید اسکریپت زیر را اضافه کنیم –
|
1 2 |
<script async custom-element="amp-pinterest" src="https://cdn.ampproject.org/v0/amp-pinterest-0.1.js"> </script> |
تگ amp-pinterest
|
1 2 3 |
<amp-pinterest width = 300 height = 450 data-do = "embedPin" data-url = "https://in.pinterest.com/pin/856739529089490354/"> </amp-pinterest> |
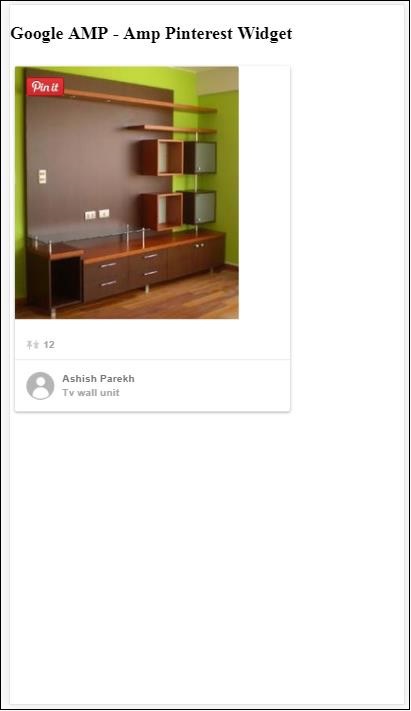
ویجت Pinterest
مثال
برای نشان دادن ویجت pinterest، باید از ویژگی data-do = “embedPin” استفاده کنیم. یک نمونه کار برای همان در اینجا نشان داده شده است –
|
1 2 3 4 5 6 7 8 9 10 11 12 13 14 15 16 17 18 19 20 21 22 23 24 25 26 27 28 29 30 31 32 33 34 35 36 37 38 39 40 41 42 43 44 45 46 47 48 49 50 51 52 53 54 55 56 |
<!doctype html> <html amp lang = "en"> <head> <meta charset = "utf-8"> <script async src = "https://cdn.ampproject.org/v0.js"> </script> <title>Google AMP - Amp Pinterest Widget</title> <link rel = "canonical" href = "http://example.ampproject.org/article-metadata.html"> <meta name = "viewport" content = "width = device-width, minimum-scale = 1,initial-scale = 1"> <style amp-boilerplate> body{ -webkit-animation: -amp-start 8s steps(1,end) 0s 1 normal both;-moz-animation: -amp-start 8s steps(1,end) 0s 1 normal both;-ms-animation: -amp-start 8s steps(1,end) 0s 1 normal both;animation: -amp-start 8s steps(1,end) 0s 1 normal both}@-webkit-keyframes -amp-start 8s steps(1,end) 0s 1 normal both } @-webkit-keyframes -amp-start{from{visibility:hidden}to{visibility:visible}}@-moz-keyframes -amp-start{from{visibility:hidden}to{visibility:visible}}@-ms-keyframes -amp-start{from{visibility:hidden}to{visibility:visible}}@-o-keyframes -amp-start{from{visibility:hidden}to{visibility:visible}}@keyframes -amp-start{from{visibility:hidden}to{visibility:visible}} </style> <noscript> <style amp-boilerplate> body{ -webkit-animation:none; -moz-animation:none; -ms-animation:none; animation:none} </style> </noscript> <script async custom-element = "amp-pinterest" src = "https://cdn.ampproject.org/v0/amp-pinterest-0.1.js"> </script> <style amp-custom> amp-facebook-like { margin: 1rem } </style> </head> <body> <h3>Google AMP - Amp Pinterest Widget</h3> <amp-pinterest width = 300 height = 450 data-do = "embedPin" data-url = "https://in.pinterest.com/pin/856739529089490354/"> </amp-pinterest> </body> </html> |
خروجی
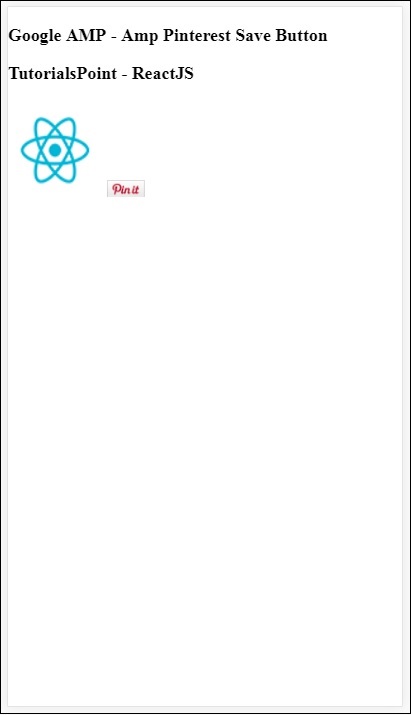
دکمه ذخیره Pinterest
برای نشان دادن دکمه ذخیره برای pinterest باید از ویژگی data-do = “buttonPin” استفاده کنیم. یک مثال فعال از دکمه ذخیره pinterest در اینجا نشان داده شده است –
مثال
|
1 2 3 4 5 6 7 8 9 10 11 12 13 14 15 16 17 18 19 20 21 22 23 24 25 26 27 28 29 30 31 32 33 34 35 36 37 38 39 40 41 42 43 44 45 46 47 48 49 50 51 52 53 54 55 |
<!doctype html> <html amp lang = "en"> <head> <meta charset = "utf-8"> <script async src = "https://cdn.ampproject.org/v0.js"> </script> <title>Google AMP - Amp Twitter</title> <link rel = "canonical" href = "http://example.ampproject.org/article-metadata.html"> <meta name = "viewport" content = "width = device-width, minimum-scale = 1,initial-scale = 1"> <style amp-boilerplate> body{ -webkit-animation: -amp-start 8s steps(1,end) 0s 1 normal both;-moz-animation: -amp-start 8s steps(1,end) 0s 1 normal both;-ms-animation: -amp-start 8s steps(1,end) 0s 1 normal both;animation: -amp-start 8s steps(1,end) 0s 1 normal both } @-webkit-keyframes -amp-start{from{visibility:hidden}to{visibility:visible}}@-moz-keyframes -amp-start{from{visibility:hidden}to{visibility:visible}}@-ms-keyframes -amp-start{from{visibility:hidden}to{visibility:visible}}@-o-keyframes -amp-start{from{visibility:hidden}to{visibility:visible}}@keyframes -amp-start{from{visibility:hidden}to{visibility:visible}} </style> <noscript> <style amp-boilerplate> body{ -webkit-animation:none; -moz-animation:none; -ms-animation:none; animation:none} </style> </noscript> <script async custom-element = "amp-twitter" src = "https://cdn.ampproject.org/v0/amp-twitter-0.1.js"> </script> <style amp-custom> amp-facebook-like { margin: 1rem } </style> </head> <body> <h3>Google AMP - Amp Twitter</h3> <amp-twitter width = "375" height = "472" layout = "responsive" data-tweetid = "885634330868850689"> </amp-twitter> </body> </html> |
خروجی
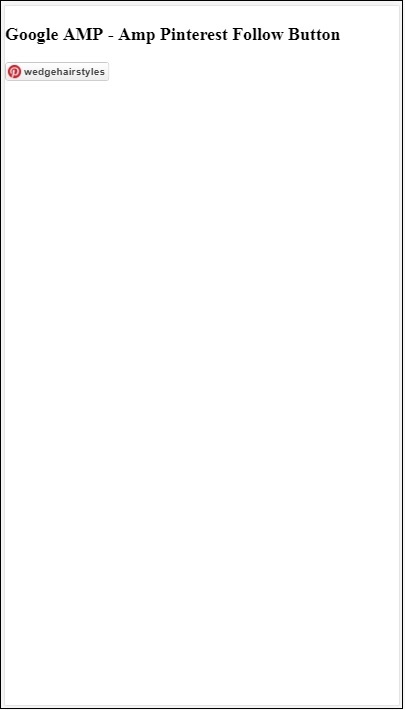
دکمه فالو Pinterest
برای نشان دادن دکمه ذخیره follow برای Pinterest ، باید از ویژگی data-do = “buttonFollow” استفاده کنیم. یک نمونه کار از دکمه ذخیره Pinterest در اینجا نشان داده شده است –
مثال
|
1 2 3 4 5 6 7 8 9 10 11 12 13 14 15 16 17 18 19 20 21 22 23 24 25 26 27 28 29 30 31 32 33 34 35 36 37 38 39 40 41 42 43 44 45 46 47 48 49 50 51 52 53 54 55 56 |
<!doctype html> <html amp lang = "en"> <head> <meta charset = "utf-8"> <script async src = "https://cdn.ampproject.org/v0.js"> </script> <title>Google AMP - Amp Pinterest Widget</title> <link rel = "canonical" href = "http://example.ampproject.org/article-metadata.html"> <meta name = "viewport" content = "width = device-width, minimum-scale = 1,initial-scale = 1"> <style amp-boilerplate> body{ -webkit-animation: -amp-start 8s steps(1,end) 0s 1 normal both;-moz-animation: -amp-start 8s steps(1,end) 0s 1 normal both;-ms-animation: -amp-start 8s steps(1,end) 0s 1 normal both;animation: -amp-start 8s steps(1,end) 0s 1 normal both } @-webkit-keyframes -amp-start{from{visibility:hidden}to{visibility:visible}}@-moz-keyframes -amp-start{from{visibility:hidden}to{visibility:visible}}@-ms-keyframes -amp-start{from{visibility:hidden}to{visibility:visible}}@-o-keyframes -amp-start{from{visibility:hidden}to{visibility:visible}}@keyframes -amp-start{from{visibility:hidden}to{visibility:visible}} </style> <noscript> <style amp-boilerplate> body{ -webkit-animation:none; -moz-animation:none; -ms-animation:none; animation:none} </style> </noscript> <script async custom-element = "amp-pinterest" src = "https://cdn.ampproject.org/v0/amp-pinterest-0.1.js"> </script> <style amp-custom> amp-facebook-like { margin: 1rem } </style> </head> <body> <h3>Google AMP - Amp Pinterest Follow Button</h3> <amp-pinterest height = 50 width = 130 data-do = "buttonFollow" data-href = "https://in.pinterest.com/wedgehairstyles/" data-label = "wedgehairstyles"> </amp-pinterest> </body> </html> |
خروجی
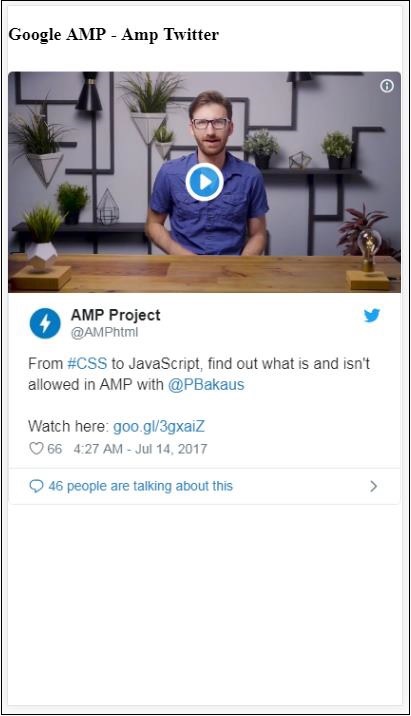
Google Amp – توییتر
Amp دارای یک جز برای نمایش فیدهای توییتر با استفاده از amp-twitter است.
برای کار با amp-twitter باید اسکریپت زیر را اضافه کنیم –
|
1 2 3 |
<script async custom-element = "amp-twitter" src = "https://cdn.ampproject.org/v0/amp-twitter-0.1.js"> </script> |
تگ amp-twitter
|
1 2 3 |
<amp-twitter width = "375" height = "472" layout = "responsive" data-tweetid = "885634330868850689"> </amp-twitter |
یک مثال عملی که توییت ها را نشان می دهد در اینجا نشان داده شده است
مثال
|
1 2 3 4 5 6 7 8 9 10 11 12 13 14 15 16 17 18 19 20 21 22 23 24 25 26 27 28 29 30 31 32 33 34 35 36 37 38 39 40 41 42 43 44 45 46 47 48 49 50 51 52 53 54 55 |
<!doctype html> <html amp lang = "en"> <head> <meta charset = "utf-8"> <script async src = "https://cdn.ampproject.org/v0.js"> </script> <title>Google AMP - Amp Twitter</title> <link rel = "canonical" href = "http://example.ampproject.org/article-metadata.html"> <meta name = "viewport" content = "width = device-width, minimum-scale = 1,initial-scale = 1"> <style amp-boilerplate> body{ -webkit-animation: -amp-start 8s steps(1,end) 0s 1 normal both;-moz-animation: -amp-start 8s steps(1,end) 0s 1 normal both;-ms-animation: -amp-start 8s steps(1,end) 0s 1 normal both;animation: -amp-start 8s steps(1,end) 0s 1 normal both } @-webkit-keyframes -amp-start{from{visibility:hidden}to{visibility:visible}}@-moz-keyframes -amp-start{from{visibility:hidden}to{visibility:visible}}@-ms-keyframes -amp-start{from{visibility:hidden}to{visibility:visible}}@-o-keyframes -amp-start{from{visibility:hidden}to{visibility:visible}}@keyframes -amp-start{from{visibility:hidden}to{visibility:visible}} </style> <noscript> <style amp-boilerplate> body{ -webkit-animation:none; -moz-animation:none; -ms-animation:none; animation:none} </style> </noscript> <script async custom-element = "amp-twitter" src = "https://cdn.ampproject.org/v0/amp-twitter-0.1.js"> </script> <style amp-custom> amp-facebook-like { margin: 1rem } </style> </head> <body> <h3>Google AMP - Amp Twitter</h3> <amp-twitter width = "375" height = "472" layout = "responsive" data-tweetid = "885634330868850689"> </amp-twitter> </body> </html> |
خروجی
لیست جلسات قبل آموزش گوگل AMP
- آموزش گوگل AMP
- بررسی اجمالی گوگل AMP
- مقدمه گوگل AMP
- آموزش تصاویر در گوگل AMP
- آموزش فرم در گوگل AMP
- آموزش Iframes در گوگل AMP
- آموزش ویدیو در گوگل AMP
- آموزش دکمه در گوگل AMP
- آموزش Timeago در گوگل AMP
- آموزش Mathml در گوگل AMP
- آموزش تگ Fit Text در گوگل AMP
- آموزش شمارش معکوس تاریخ در گوگل AMP
- آموزش انتخاب کننده تاریخ در گوگل AMP
- آموزش استوری در گوگل AMP
- آموزش انتخاب کننده در گوگل AMP
- آموزش لینک در گوگل AMP
- آموزش فونت در گوگل AMP
- آموزش لیست در گوگل AMP
- آموزش اعلان کاربر در گوگل AMP
- آموزش next page در گوگل AMP
- آموزش ویژگی ها در گوگل AMP
- آموزش استایل ها و CSS سفارشی در گوگل AMP
- آموزش کلاس های CSS پویا در گوگل AMP
- آموزش اکشن ها و رویدادها در گوگل AMP
- آموزش انیمیشن در گوگل AMP
- آموزش اتصال داده در گوگل AMP
- آموزش طرح بندی در گوگل AMP
- آموزش تبلیغات در گوگل AMP
- آموزش تجزیه و تحلیل در گوگل AMP
- آموزش ویجت های اجتماعی در گوگل AMP
- آموزش نحو در گوگل AMP
- آموزش اعتبار سنجی در گوگل AMP
- آموزش اجزا جاوا اسکریپت در گوگل AMP


.svg)
دیدگاه شما