
آموزش اتصال داده در گوگل AMP

آموزش اتصال داده در گوگل AMP
در این درس از مجموعه آموزش برنامه نویسی سایت سورس باران، به آموزش اتصال داده در گوگل AMP خواهیم پرداخت.
Amp-bind کمک می کند تا بر اساس یک عمل با استفاده از عبارات اتصال داده و مانند JS، تعاملی به مولفه های amp و تگ های html اضافه شود. در این درس اتصال داده ها به طور مفصل مورد بحث قرار می گیرد.
برای کار با amp-bind ، باید اسکریپت زیر را به صفحه خود اضافه کنیم –
|
1 2 3 |
<script async custom-element = "amp-bind" src = "https://cdn.ampproject.org/v0/amp-bind-0.1.js"> </script> |
همانطور که نشان داده شده است ، اجازه دهید این مسئله را به طور کامل درک کنیم –
مثال
|
1 2 3 4 5 6 7 8 9 10 11 12 13 14 15 16 17 18 19 20 21 22 23 24 25 26 27 28 29 30 31 32 33 34 35 36 37 38 39 40 41 42 43 44 45 46 47 48 49 50 51 52 53 54 55 56 57 |
<!doctype html> <html amp lang = "en"> <head> <meta charset = "utf-8"> <script async src = "https://cdn.ampproject.org/v0.js"></script> <title>Google AMP - Amp Bind</title> <link rel = "canonical" href = "http://example.ampproject.org/article-metadata.html"> <meta name = "viewport" content = "width = device-width, minimum-scale = 1,initial-scale = 1"> <style amp-boilerplate> body{ -webkit-animation: -amp-start 8s steps(1,end) 0s 1 normal both;-moz-animation: -amp-start 8s steps(1,end) 0s 1 normal both;-ms-animation: -amp-start 8s steps(1,end) 0s 1 normal both;animation: -amp-start 8s steps(1,end) 0s 1 normal both } @-webkit-keyframes -amp-start{from{visibility:hidden}to{visibility:visible}}@-moz-keyframes -amp-start{from{visibility:hidden}to{visibility:visible}}@-ms-keyframes -amp-start{from{visibility:hidden}to{visibility:visible}}@-o-keyframes -amp-start{from{visibility:hidden}to{visibility:visible}}@keyframes -amp-start{from{visibility:hidden}to{visibility:visible}} </style> <noscript> <style amp-boilerplate> body{ -webkit-animation:none; -moz-animation:none; -ms-animation:none; animation:none } </style> </noscript> <script async custom-element = "amp-bind" src = "https://cdn.ampproject.org/v0/amp-bind-0.1.js"></script> <style amp-custom> button{ background-color: #ACAD5C; color: white; padding: 12px 20px; border: none; border-radius: 4px; } </style> </head> <body> <h3>Google AMP - Amp Bind</h3> <p [text] = "'Hello ' + world + '.'"> Click on the button to change the text </p> <button on = "tap:AMP.setState({world: 'This is amp-bind example'})"> Click Here </button> </body> </html> |
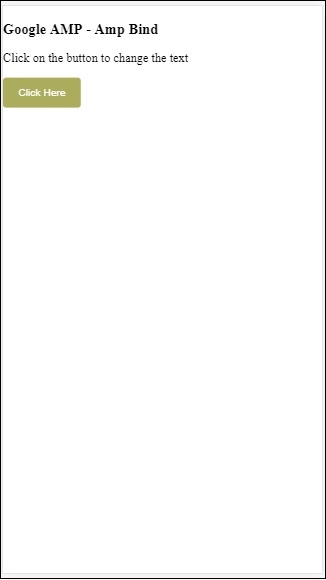
برای تغییر متن روی دکمه کلیک کنید
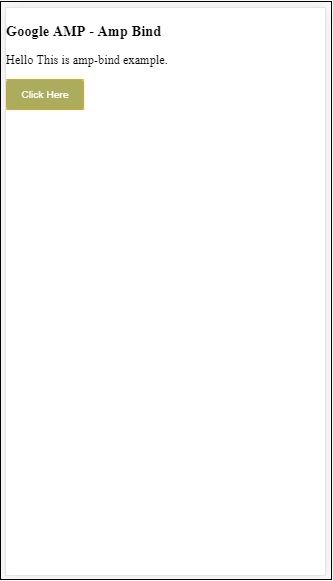
بنابراین ، در مثال نشان داده شده در بالا ما از amp-bind برای تغییر متن با کلیک دکمه استفاده کرده ایم.
اتصال دارای سه جز است –
- State در ابتدا State خالی است. پس از کلیک بر روی دکمه حالت تغییر می کند. مثلا،
|
1 2 3 |
<button on = "tap:AMP.setState({world: 'This is amp-bind example'})"> Click Here </button> |
برای تغییر حالت از روش AMP.setState استفاده می شود. به دنیای متغیر مقدار داده می شود این مثال amp-bind است. جهان متغیر در داخل برچسب html استفاده می شود –
|
1 2 3 |
<p [text] = "'Hello ' + world + '.'"> Click on the button to change the text </p> |
با کلیک روی دکمه، به دنیا مقدار جدیدی اختصاص داده می شود: این مثال amp-bind است.
ما همچنین می توانیم حالت amp را با اتصال مانند شکل زیر استفاده کنیم –
|
1 2 3 4 5 6 7 |
<amp-state id = "myState"> <script type = "application/json"> { "foo": "bar" } </script> </amp-state> |
در هنگام اتصال به عبارت bmyState.foo اختصاص داده می شود.
- Expressions – عبارات amp-bind به کار به صورت زیر بیان می شود –
|
1 |
'Hello ' + world |
گفته می شود world یک متغیر حالت است.
Bindings– پیوندها به صفات خاص در فرم [ویژگی ها] اعمال می شوند. به عنوان مثال –
|
1 2 3 |
<p [text] = "'Hello ' + world + '.'"> Click on the button to change the text </p> |
در مثال بالا ، [متن] عبارتی دارد که برای اتصال تگ p استفاده می شود.
برای اتصال می توانیم از ویژگی زیر استفاده کنیم –
- [text]
- [class]
- [hidden]
- [width]
- [height]
اتصال نیز می تواند بر روی اجزای آمپ انجام شود و فقط ویژگی های خاص مجاز است. لیست زیر مولفه ها و ویژگی های suh را نشان می دهد –
| Amp جز | ویژگی و توضیح | |
|---|---|---|
| 1 | <amp-carousel type=slides> | [slide]*اسلاید را با استفاده از این ویژگی اتصال تغییر دهید |
| 2 | <amp-date-picker> | [min]اولین تاریخ قابل انتخاب را تنظیم می کند
[max]آخرین تاریخ قابل انتخاب را تنظیم می کند |
| 3 | <amp-iframe> | [src]src iframe را تغییر دهید |
| 4 | <amp-img> | [alt] [attribution] [src] [srcset]ما می توانیم alt ، Attribution ، src و srcset را تغییر دهیم. اگر src تغییر کرد srcset را تغییر دهید زیرا برای caching استفاده می شود |
| 5 | <amp-lightbox> | [open]*با اتصال برای باز کردن می توانید جعبه سبک را نمایش یا پنهان کنید |
| 6 | <amp-list> | [src]اگر عبارت یک رشته باشد ، JSON را از URL رشته واکشی کرده و ارائه می دهد. اگر عبارت یک شی یا آرایه است ، داده های عبارت را ارائه می دهد. |
| 7 | <amp-selector> | [selected]* [disabled]عناصر فعلی انتخاب شده را که با مقادیر ویژگی گزینه مشخص می شوند ، تغییر می دهد. لیستی از مقادیر جدا شده با ویرگول را برای انتخاب چندگانه پشتیبانی می کند |
اتصال با استفاده از Amp-State
ما می توانیم با تمام داده هایی که می خواهیم روی عنصر html یا amp-component استفاده کنیم ، حالت amp را تعریف کنیم.
داده های استفاده شده در داخل حالت amp باید مانند فرمت json باشد –
|
1 2 3 4 5 6 7 8 9 10 11 12 13 |
<amp-state id = "myCarsList"> <script type = "application/json"> { "currentcar" : "bmw", "audi": { "imageUrl": "images/audi.jpg" }, "bmw": { "imageUrl": "images/bmw.jpg" } } </script> </amp-state> |
بنابراین، ما جفت مقدار-کلید را با نام ماشین و تصویر استفاده شده برای ماشین تعریف کرده ایم.
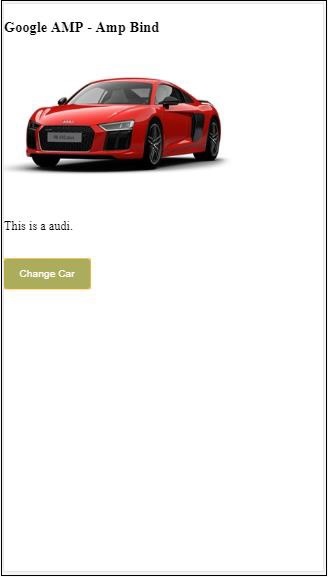
اتصال متن و تصویرamp
یک مثال مفید با استفاده از حالت اتصال با amp-state در زیر نشان داده شده است –
|
1 2 3 4 5 6 7 8 9 10 11 12 13 14 15 16 17 18 19 20 21 22 23 24 25 26 27 28 29 30 31 32 33 34 35 36 37 38 39 40 41 42 43 44 45 46 47 48 49 50 51 52 53 54 55 56 57 58 59 60 61 62 63 64 65 66 67 68 69 70 71 72 73 74 75 76 77 78 79 80 81 82 |
<!doctype html> <html amp lang = "en"> <head> <meta charset = "utf-8"> <script async src = "https://cdn.ampproject.org/v0.js"></script> <title>Google AMP - Amp Bind</title> <link rel = "canonical" href = "http://example.ampproject.org/article-metadata.html"> <meta name = "viewport" content = "width = device-width, minimum-scale = 1,initial-scale = 1"> <style amp-boilerplate> body{ -webkit-animation: -amp-start 8s steps(1,end) 0s 1 normal both;-moz-animation: -amp-start 8s steps(1,end) 0s 1 normal both;-ms-animation: -amp-start 8s steps(1,end) 0s 1 normal both;animation: -amp-start 8s steps(1,end) 0s 1 normal both } @-webkit-keyframes -amp-start{from{visibility:hidden}to{visibility:visible}}@-moz-keyframes -amp-start{from{visibility:hidden}to{visibility:visible}}@-ms-keyframes -amp-start{from{visibility:hidden}to{visibility:visible}}@-o-keyframes -amp-start{from{visibility:hidden}to{visibility:visible}}@keyframes -amp-start{from{visibility:hidden}to{visibility:visible} } </style> <noscript> <style amp-boilerplate> body{ -webkit-animation:none; -moz-animation:none; -ms-animation:none; animation:none } </style> </noscript> <script async custom-element = "amp-bind" src = "https://cdn.ampproject.org/v0/amp-bind-0.1.js"></script> <style amp-custom> button{ background-color: #ACAD5C; color: white; padding: 12px 20px; border: none; border-radius: 4px; cursor: pointer; float: left; } </style> </head> <body> <h3>Google AMP - Amp Bind</h3> <amp-state id = "myCarsList"> <script type = "application/json"> { "currentcar" : "bmw", "audi": { "imageUrl": "images/audi.jpg", "style": "greenBackground" }, "bmw": { "imageUrl": "images/bmw.jpg", "style": "redBackground" } } </script> </amp-state> <amp-img width = "300" height = "200" src = "images/bmw.jpg" [src] = "myCarsList[currentcar].imageUrl"> </amp-img> <p [text] = "'This is a ' + currentcar + '.'"> This is a BMW. </p> <br/> <button on = "tap:AMP.setState({currentcar: 'audi'})"> Change Car </button> </body> </html> |
خروجی
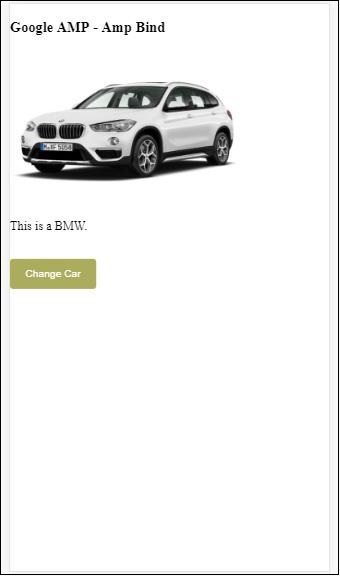
برای دیدن تصویر تغییر ماشین و همچنین متن زیر روی دکمه کلیک کنید.
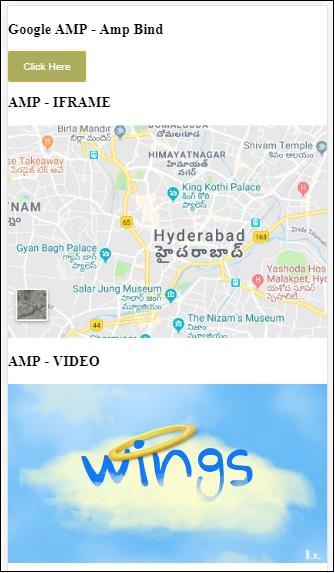
اتصال amp در ویدئو و IFrame
اکنون یک مثال عملی خواهیم دید که amp-iframe و amp-video src را تغییر می دهد.
|
1 2 3 4 5 6 7 8 9 10 11 12 13 14 15 16 17 18 19 20 21 22 23 24 25 26 27 28 29 30 31 32 33 34 35 36 37 38 39 40 41 42 43 44 45 46 47 48 49 50 51 52 53 54 55 56 57 58 59 60 61 62 63 64 65 66 67 68 69 70 71 72 73 74 75 76 77 78 79 80 81 82 83 84 85 86 87 88 89 90 91 92 93 94 95 96 97 98 99 100 |
<!doctype html> <html amp lang = "en"> <head> <meta charset = "utf-8"> <script async src = "https://cdn.ampproject.org/v0.js"></script> <title>Google AMP - Amp Bind</title> <link rel = "canonical" href = "http://example.ampproject.org/article-metadata.html"> <meta name = "viewport" content = "width = device-width, minimum-scale = 1,initial-scale = 1"> <style amp-boilerplate> body{ -webkit-animation: -amp-start 8s steps(1,end) 0s 1 normal both;-moz-animation: -amp-start 8s steps(1,end) 0s 1 normal both;-ms-animation: -amp-start 8s steps(1,end) 0s 1 normal both;animation: -amp-start 8s steps(1,end) 0s 1 normal both } @-webkit-keyframes -amp-start{from{visibility:hidden}to{visibility:visible}}@-moz-keyframes -amp-start{from{visibility:hidden}to{visibility:visible}}@-ms-keyframes -amp-start{from{visibility:hidden}to{visibility:visible}}@-o-keyframes -amp-start{from{visibility:hidden}to{visibility:visible}}@keyframes -amp-start{from{visibility:hidden}to{visibility:visible}} </style> <noscript> <style amp-boilerplate> body{ -webkit-animation:none; -moz-animation:none; -ms-animation:none; animation:none } </style> </noscript> <script async custom-element = "amp-bind" src = "https://cdn.ampproject.org/v0/amp-bind-0.1.js"></script> <script async custom-element = "amp-video" src = "https://cdn.ampproject.org/v0/amp-video-0.1.js"></script> <script async custom-element = "amp-iframe" src = "https://cdn.ampproject.org/v0/amp-iframe-0.1.js"></script> <style amp-custom> button{ background-color: #ACAD5C; color: white; padding: 12px 20px; border: none; border-radius: 4px; cursor: pointer; float: left; } </style> </head> <body> <h3>Google AMP - Amp Bind</h3> <button on = "tap:AMP.setState({currentlist: 'list1'})"> Click Here </button> <br/> <br/> <amp-state id = "myList"> <script type = "application/json"> { "currentlist" : "", "list1": { "url": "video/m.mp4", "style": "greenBackground", "iframeurl":"https://maps.google.com/maps?q=hyderabad&t=&z=13&ie=UTF8&iwloc=&output=embed" } } </script> </amp-state> <h3>AMP - IFRAME</h3> <amp-iframe width = "600" title = "Google map" height = "400" layout = "responsive" sandbox = "allow-scripts allow-same-origin allow-popups" frameborder = "0" src = "https://maps.google.com/maps?q=telangana&t=&z=13&ie=UTF8&iwloc=&output=embed" [src] = "myList[currentlist].iframeurl"> <amp-img layout = "fill" src = "images/loading.jpg" placeholder > /amp-img> </amp-iframe> <h3>AMP - VIDEO</h3> <amp-video id = "amp-video" src = "video/samplevideo.mp4" layout="responsive" [src] = "myList[currentlist].url" width = "300" height = "170" autoplay controls> </amp-video> </body> </html> |
توجه داشته باشید که در اینجا ما از حالت amp با iframesrc و video src استفاده کرده ایم.
|
1 2 3 4 5 6 7 8 9 10 11 12 13 |
<amp-state id = "myList"> <script type = "application/json"> { "currentlist" : "", "list1": { "url": "video/m.mp4", "style": "greenBackground", "iframeurl":" https://maps.google.com/maps?q=hyderabad&t=&z=13&ie=UTF8&iwloc=&output=embed" } } </script> </amp-state> |
لیست فعلی خالی است و با ضربه زدن روی دکمه ، روی لیست 1 تنظیم شده است. لیست فعلی قابل ویرایش برای src iframe و ویدیو استفاده می شود همانطور که در زیر نشان داده شده است –
|
1 2 3 4 5 6 7 8 9 10 11 12 13 14 |
<amp-iframe width="600" title = "Google map" height = "400" layout = "responsive" sandbox = "allow-scripts allow-same-origin allow-popups" frameborder = "0" src = "https://maps.google.com/maps?q=telangana&t=&z=13&ie=UTF8&iwloc=&output=embed" [src] = "myList[currentlist].iframeurl"> <amp-img layout = "fill" src = "images/loading.jpg" placeholder> </amp-img> </amp-iframe> <amp-video id = "amp-video" src = "video/samplevideo.mp4" layout = "responsive" [src] = "myList[currentlist].url" width = "300" height = "170" autoplay controls> </amp-video> |
خروجی

برای دیدن فیلم و تغییر iframe src روی دکمه کلیک کنید.
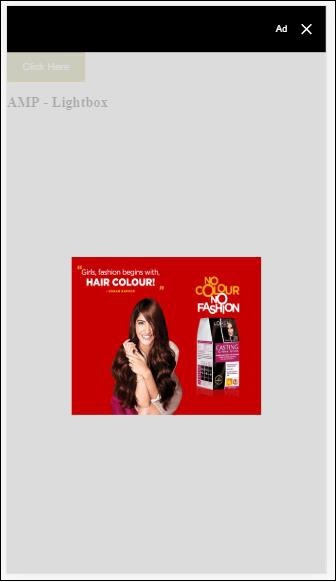
Amp-bind با amp-lightbox
حال ، بیایید عملکرد اAmp-bind با amp-lightbox را در هنگام استفاده با هم مشاهده کنیم.
مثال
|
1 2 3 4 5 6 7 8 9 10 11 12 13 14 15 16 17 18 19 20 21 22 23 24 25 26 27 28 29 30 31 32 33 34 35 36 37 38 39 40 41 42 43 44 45 46 47 48 49 50 51 52 53 54 55 56 57 58 59 60 61 62 63 64 65 66 67 68 69 70 71 72 73 74 75 76 77 78 79 80 81 82 83 |
<!doctype html> <html amp lang = "en"> <head> <meta charset = "utf-8"> <script async src="https://cdn.ampproject.org/v0.js"></script> <title>Google AMP - Amp Bind</title> <link rel = "canonical" href = "http://example.ampproject.org/article-metadata.html"> <meta name = "viewport" content = "width = device-width, minimum-scale = 1,initial-scale = 1"> <style amp-boilerplate> body{ -webkit-animation: -amp-start 8s steps(1,end) 0s 1 normal both;-moz-animation: -amp-start 8s steps(1,end) 0s 1 normal both;-ms-animation: -amp-start 8s steps(1,end) 0s 1 normal both;animation: -amp-start 8s steps(1,end) 0s 1 normal both } @-webkit-keyframes -amp-start{from{visibility:hidden}to{visibility:visible}}@-moz-keyframes -amp-start{from{visibility:hidden}to{visibility:visible}}@-ms-keyframes -amp-start{from{visibility:hidden}to{visibility:visible}}@-o-keyframes -amp-start{from{visibility:hidden}to{visibility:visible}}@keyframes -amp-start{from{visibility:hidden}to{visibility:visible}} </style> <noscript> <style amp-boilerplate> body{ -webkit-animation:none; -moz-animation:none; -ms-animation:none; animation:none } </style> </noscript> <script async custom-element = "amp-bind" src = "https://cdn.ampproject.org/v0/amp-bind-0.1.js"></script> <script async custom-element = "amp-lightbox" src = "https://cdn.ampproject.org/v0/amp-lightbox-0.1.js"></script> <style amp-custom> button{ background-color: #ACAD5C; color: white; padding: 12px 20px; border: none; border-radius: 4px; cursor: pointer; float: left; } .lightbox { background: rgba(211,211,211,0.8); width: 100%; height: 100%; position: absolute; display: flex; align-items: center; justify-content: center; } </style> </head> <body> <h3>Google AMP - Amp Bind</h3> <button on = "tap:AMP.setState({displaylightbox: true})"> Click Here </button> <br/> <br/> <h3>AMP - Lightbox</h3> <amp-lightbox id = "my-lightbox" [open] = "displaylightbox" layout = "nodisplay" close-button> <div class = "lightbox" on = "tap:AMP.setState({displaylightbox: false})"> <amp-img alt = "Beautiful Flower" src = "images/loreal.gif" width = "246" height = "205"> </amp-img> </div> </amp-lightbox> </body> </html> |
برای استفاده از اتصال در amp-lightbox، ما از [open] در amp-lightbox مانند شکل زیر استفاده کرده ایم –
|
1 2 3 4 5 6 7 8 9 10 |
<amp-lightbox id = "my-lightbox" [open] = "displaylightbox" layout = "nodisplay" close-button> <div class = "lightbox" on="tap:AMP.setState({displaylightbox: false})"> <amp-img alt = "Beautiful Flower" src = "images/loreal.gif" width = "246" height = "205"> </amp-img> </div> </amp-lightbox> |
[open] = “displaylightbox” یک حالت متغیر است که با کلیک دکمه lightbox به true / false تغییر می یابد –
|
1 2 3 4 5 6 7 8 9 10 11 |
<button on = "tap:AMP.setState({displaylightbox: true})"> Click Here </button> <div class = "lightbox" on = "tap:AMP.setState({displaylightbox: false})"> <amp-img alt = "Beautiful Flower" src = "images/loreal.gif" width = "246" height = "205"> </amp-img> </div> |
خروجی
اتصال amp به عنصر ورودی
همانطور که نشان داده شده است ، اجازه می دهیم کار اتصال amp به عنصر ورودی را درک کنیم –
|
1 2 3 4 5 6 7 8 9 10 11 12 13 14 15 16 17 18 19 20 21 22 23 24 25 26 27 28 29 30 31 32 33 34 35 36 37 38 39 40 41 42 43 44 45 46 47 48 49 50 51 52 53 54 55 56 57 58 59 60 61 62 63 64 65 66 67 68 69 70 71 72 73 74 75 76 77 78 79 80 81 82 83 84 85 86 87 88 89 90 |
<!doctype html> <html amp lang = "en"> <head> <meta charset = "utf-8"> <script async src = "https://cdn.ampproject.org/v0.js"></script> <title>Google AMP - Amp Bind</title> <link rel = "canonical" href= "http://example.ampproject.org/article-metadata.html"> <meta name = "viewport" content = "width = device-width, minimum-scale = 1,initial-scale = 1"> <style amp-boilerplate> body{ -webkit-animation: -amp-start 8s steps(1,end) 0s 1 normal both;-moz-animation: -amp-start 8s steps(1,end) 0s 1 normal both;-ms-animation: -amp-start 8s steps(1,end) 0s 1 normal both;animation: -amp-start 8s steps(1,end) 0s 1 normal both } @-webkit-keyframes -amp-start{from{visibility:hidden}to{visibility:visible}}@-moz-keyframes -amp-start{from{visibility:hidden}to{visibility:visible}}@-ms-keyframes -amp-start{from{visibility:hidden}to{visibility:visible}}@-o-keyframes -amp-start{from{visibility:hidden}to{visibility:visible}}@keyframes -amp-start{from{visibility:hidden}to{visibility:visible}} </style> <noscript> <style amp-boilerplate> body{ -webkit-animation:none; -moz-animation:none; -ms-animation:none; animation:none } </style> <noscript> <script async custom-element = "amp-bind" src = "https://cdn.ampproject.org/v0/amp-bind-0.1.js"> <script> <script async custom-element = "amp-lightbox" src = "https://cdn.ampproject.org/v0/amp-lightbox-0.1.js"> </script> <style amp-custom> button{ background-color: #ACAD5C; color: white; padding: 12px 20px; border: none; border-radius: 4px; cursor: pointer; float: left; } .lightbox { background: rgba(211,211,211,0.8); width: 100%; height: 100%; position: absolute; display: flex; align-items: center; justify-content: center; } #txtname{ width: 100%; padding: 12px 20px; margin: 8px 0; display: inline-block; border: 1px solid #ccc; border-radius: 4px; box-sizing: border-box; } div { font-size:25px; } </style> </head> <body> <h3>Google AMP - Amp Bind</h3> <button on = "tap:AMP.setState({displaylightbox: true})"> Click Here </button> <br/> <br/> <h3> AMP - Input Element <h3> <input id = "txtname" placeholder = "Type here" on = "input-throttled:AMP.setState({name: event.value})"> <div [text] = "name"> </div> </body> </html> |
خروجی
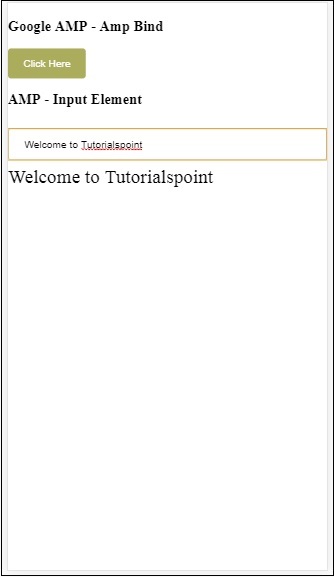
داده های وارد شده در داخل جعبه متن در پایین نمایش داده می شود. همانطور که نشان داده شده است می توان با تغییر نام متغیر حالت در رویداد ورودی –
|
1 2 3 4 |
<input id = "txtname" placeholder = "Type here" on = "input-throttled:AMP.setState({name: event.value})"> <div [text] = "name"> </div> |
لیست جلسات قبل آموزش گوگل AMP
- آموزش گوگل AMP
- بررسی اجمالی گوگل AMP
- مقدمه گوگل AMP
- آموزش تصاویر در گوگل AMP
- آموزش فرم در گوگل AMP
- آموزش Iframes در گوگل AMP
- آموزش ویدیو در گوگل AMP
- آموزش دکمه در گوگل AMP
- آموزش Timeago در گوگل AMP
- آموزش Mathml در گوگل AMP
- آموزش تگ Fit Text در گوگل AMP
- آموزش شمارش معکوس تاریخ در گوگل AMP
- آموزش انتخاب کننده تاریخ در گوگل AMP
- آموزش استوری در گوگل AMP
- آموزش انتخاب کننده در گوگل AMP
- آموزش لینک در گوگل AMP
- آموزش فونت در گوگل AMP
- آموزش لیست در گوگل AMP
- آموزش اعلان کاربر در گوگل AMP
- آموزش next page در گوگل AMP
- آموزش ویژگی ها در گوگل AMP
- آموزش استایل ها و CSS سفارشی در گوگل AMP
- آموزش کلاس های CSS پویا در گوگل AMP
- آموزش اکشن ها و رویدادها در گوگل AMP
- آموزش انیمیشن در گوگل AMP
- آموزش اتصال داده در گوگل AMP
- آموزش طرح بندی در گوگل AMP
- آموزش تبلیغات در گوگل AMP
- آموزش تجزیه و تحلیل در گوگل AMP
- آموزش ویجت های اجتماعی در گوگل AMP
- آموزش نحو در گوگل AMP
- آموزش اعتبار سنجی در گوگل AMP
- آموزش اجزا جاوا اسکریپت در گوگل AMP


.svg)
دیدگاه شما