
آموزش لیست در گوگل AMP
5 سال پیش

آموزش لیست در گوگل AMP
در این درس از مجموعه آموزش برنامه نویسی سایت سورس باران، به آموزش لیست در گوگل AMPخواهیم پرداخت.
Amp-list یک جز amp است که یک نقطه پایانی CORS json را فراخوانی می کند و داده ها را به صورت فایل json در داخل الگو نمایش می دهد. بگذارید با کمک مثالهای مفید این موضوع را درک کنیم.
برای کار با amp-list، باید اسکریپت زیر را اضافه کنیم –
|
1 2 3 |
<script async custom-element = "amp-list" src = "https://cdn.ampproject.org/v0/amp-list-0.1.js"> </script> |
این فرمت تگ amp-list است –
|
1 2 3 4 5 6 7 8 9 10 11 12 |
<amp-list width = "auto" height = "100" layout = "fixed-height" src = "amplist.json" class = "m1"> <template type = "amp-mustache"> <div class = "images_for_display"> <amp-img width = "150" height = "100" alt = "{{title}}" src = "{{url}}"> </amp-img> </div> </template> </amp-list> |
src مورد استفاده برای amp-list یک فایل json است که دارای جزئیاتی است که باید لیست شود. ما می توانیم از تگ های معمولی html یا amp-component های داخل amp-list برای نمایش داده ها از پرونده json استفاده کنیم. نوع الگوی amp-mustache برای اتصال داده ها برای نمایش داده ها استفاده می شود.
بگذارید این موضوع را با کمک مثال مثالی که در زیر نشان داده شده درک کنیم –
مثال
|
1 2 3 4 5 6 7 8 9 10 11 12 13 14 15 16 17 18 19 20 21 22 23 24 25 26 27 28 29 30 31 32 33 34 35 36 37 38 39 40 41 42 43 44 45 46 47 48 49 50 51 52 53 54 55 56 57 58 59 60 61 62 63 64 |
<!doctype html> <html amp lang = "en"> <head> <meta charset = "utf-8"> <script async src = "https://cdn.ampproject.org/v0.js"></script> <title>Google AMP - Amp List</title> <link rel = "canonical" href = "http://example.ampproject.org/article-metadata.html"> <meta name = "viewport" content = "width = device-width,minimum-scale = 1,initial-scale = 1"> <style amp-boilerplate> body{-webkit-animation: -amp-start 8s steps(1,end) 0s 1 normal both;-moz-animation: -amp-start 8s steps(1,end) 0s 1 normal both;-ms-animation: -amp-start 8s steps(1,end) 0s 1 normal both;animation: -amp-start 8s steps(1,end) 0s 1 normal both } @-webkit-keyframes -amp-start{from{visibility:hidden}to{visibility:visible}}@-moz-keyframes -amp-start{from{visibility:hidden}to{visibility:visible}}@-ms-keyframes -amp-start{from{visibility:hidden}to{visibility:visible}}@-o-keyframes -amp-start{from{visibility:hidden}to{visibility:visible}}@keyframes -amp-start{from{visibility:hidden}to{visibility:visible}} </style> <noscript> <style amp-boilerplate> body{ -webkit-animation:none;-moz-animation:none; -ms-animation:none;animation:none} </style> </noscript> <script async custom-element = "amp-list" src = "https://cdn.ampproject.org/v0/amp-list-0.1.js"> </script> <script async custom-template = "amp-mustache" src ="https://cdn.ampproject.org/v0/amp-mustache-0.2.js"> </script> <style amp-custom> amp-img { border: 1px solid #ddd; border-radius: 4px; padding: 5px; } </style> </head> <body> <h3>Google AMP - Amp List</h3> <amp-list width = "auto" height = "100" layout = "fixed-height" src = "amplist.json" class = "m1"> <template type = "amp-mustache"> <div class = "images_for_display"> <amp-img width = "150" height = "100" alt = "{{title}}" src = "{{url}}"> </amp-img> </div> </template> </amp-list> </body> </html> |
خروجی
خروجی نمونه کار نشان داده شده در بالا به شرح زیر است –
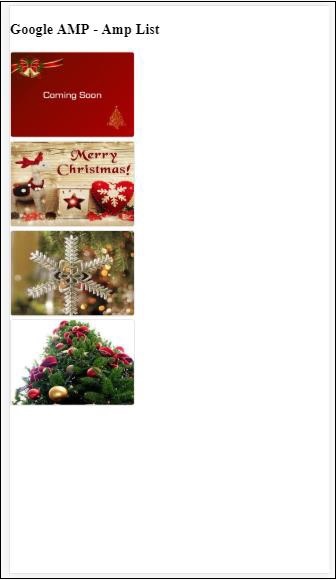
فایل json مورد استفاده در مثال کاری ذکر شده در بالا در اینجا نشان داده شده است –
|
1 2 3 4 5 6 7 8 9 10 11 12 13 14 15 16 17 18 19 20 |
{ "items": [ { "title": "Christmas Image 1", "url": "images/christmas1.jpg" }, { "title": "Christmas Image 2", "url": "images/christmas2.jpg" }, { "title": "Christmas Image 3", "url": "images/christmas3.jpg" }, { "title": "Christmas Image 4", "url": "images/christmas4.jpg" } ] } |
ما می توانیم لیست را با استفاده از رویداد در لیست آمپر تازه کنیم ، همانطور که در کد داده شده در زیر نشان داده شده است –
مثال
|
1 2 3 4 5 6 7 8 9 10 11 12 13 14 15 16 17 18 19 20 21 22 23 24 25 26 27 28 29 30 31 32 33 34 35 36 37 38 39 40 41 42 43 44 45 46 47 48 49 50 51 52 53 54 55 56 57 58 59 60 61 62 63 64 65 66 67 68 69 70 71 72 73 74 75 76 77 |
<!doctype html> <html amp lang = "en"> <head> <meta charset = "utf-8"> <script async src = "https://cdn.ampproject.org/v0.js"></script> <title>Google AMP - Amp List</title> <link rel = "canonical" href = "http://example.ampproject.org/article-metadata.html"> <meta name = "viewport" content = "width = device-width,minimum-scale = 1,initial-scale = 1"> <style amp-boilerplate> body{ -webkit-animation: -amp-start 8s steps(1,end) 0s 1 normal both;-moz-animation: -amp-start 8s steps(1,end) 0s 1 normal both;-ms-animation: -amp-start 8s steps(1,end) 0s 1 normal both;animation: -amp-start 8s steps(1,end) 0s 1 normal both } @-webkit-keyframes -amp-start{from{visibility:hidden}to{visibility:visible}}@-moz-keyframes -amp-start{from{visibility:hidden}to{visibility:visible}}@-ms-keyframes -amp-start{from{visibility:hidden}to{visibility:visible}}@-o-keyframes -amp-start{from{visibility:hidden}to{visibility:visible}}@keyframes -amp-start{from{visibility:hidden}to{visibility:visible}} </style> <noscript> <style amp-boilerplate> body{ -webkit-animation:none; -moz-animation:none; -ms-animation:none; animation:none} </style> </noscript> <script async custom-element = "amp-list" src = "https://cdn.ampproject.org/v0/amp-list-0.1.js"> </script> <script async custom-template = "amp-mustache" src = "https://cdn.ampproject.org/v0/amp-mustache-0.2.js"> </script> <style amp-custom> amp-img { border: 1px solid #ddd; border-radius: 4px; padding: 5px; } button{ background-color: #ACAD5C; color: white; padding: 12px 20px; border: none; border-radius: 4px; cursor: pointer; float: right; } </style> </head> <body> <h3>Google AMP - Amp List</h3> <button on = "tap:amplist.refresh">Refresh Images</button> <amp-list id = "amplist" width = "auto" height = "100" layout = "fixed-height" src = "amplist.json" class = "m1"> <template type = "amp-mustache"> <div class = "images_for_display"> <amp-img width = "150" height = "100" alt = "{{title}}" src = "{{url}}"></amp-img> </div> </template> </amp-list> </body> </html> |
خروجی
خروجی مثال کار ذکر شده در بالا همانطور که در اینجا نشان داده شده است –
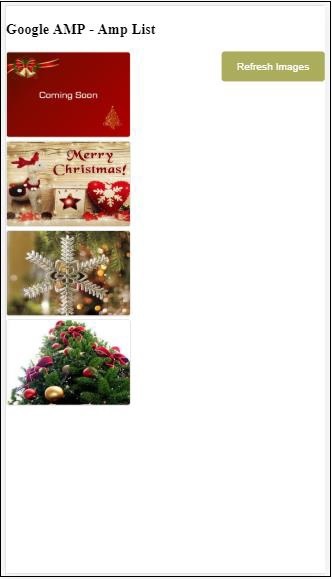
یک دکمه اضافه شده است که با کلیک آن عمل تازه سازی با استفاده از رویداد مانند شکل زیر فراخوانی می شود –
|
1 2 3 4 |
<button on = "tap:amplist.refresh"> Refresh Images </button> //amplist is the id used for amp-list |
با کلیک بر روی دکمه ، پرونده json دوباره فراخوانی می شود و محتویات بارگیری می شوند. اگر تصاویر قبلاً بارگیری شده باشند ، ذخیره می شوند.
لیست جلسات قبل آموزش گوگل AMP
- آموزش گوگل AMP
- بررسی اجمالی گوگل AMP
- مقدمه گوگل AMP
- آموزش تصاویر در گوگل AMP
- آموزش فرم در گوگل AMP
- آموزش Iframes در گوگل AMP
- آموزش ویدیو در گوگل AMP
- آموزش دکمه در گوگل AMP
- آموزش Timeago در گوگل AMP
- آموزش Mathml در گوگل AMP
- آموزش تگ Fit Text در گوگل AMP
- آموزش شمارش معکوس تاریخ در گوگل AMP
- آموزش انتخاب کننده تاریخ در گوگل AMP
- آموزش استوری در گوگل AMP
- آموزش انتخاب کننده در گوگل AMP
- آموزش لینک در گوگل AMP
- آموزش فونت در گوگل AMP
- آموزش لیست در گوگل AMP
- آموزش اعلان کاربر در گوگل AMP
- آموزش next page در گوگل AMP
- آموزش ویژگی ها در گوگل AMP
- آموزش استایل ها و CSS سفارشی در گوگل AMP
- آموزش کلاس های CSS پویا در گوگل AMP
- آموزش اکشن ها و رویدادها در گوگل AMP
- آموزش انیمیشن در گوگل AMP
- آموزش اتصال داده در گوگل AMP
- آموزش طرح بندی در گوگل AMP
- آموزش تبلیغات در گوگل AMP
- آموزش تجزیه و تحلیل در گوگل AMP
- آموزش ویجت های اجتماعی در گوگل AMP
- آموزش نحو در گوگل AMP
- آموزش اعتبار سنجی در گوگل AMP
- آموزش اجزا جاوا اسکریپت در گوگل AMP
نویسنده مطلب
saber


.svg)
دیدگاه شما